Part of Guide to creating services in the NHS e-Referral Service on the Path to Live environments
Creating a new referral assessment service
These instructions cover the entry of mandatory information required to create a referral assessment service (RAS) or triage service.
You may require additional test services, such as directly bookable services (DBS), for your integration testing or assurance stages.
Supporting information is available within the e-RS online help.
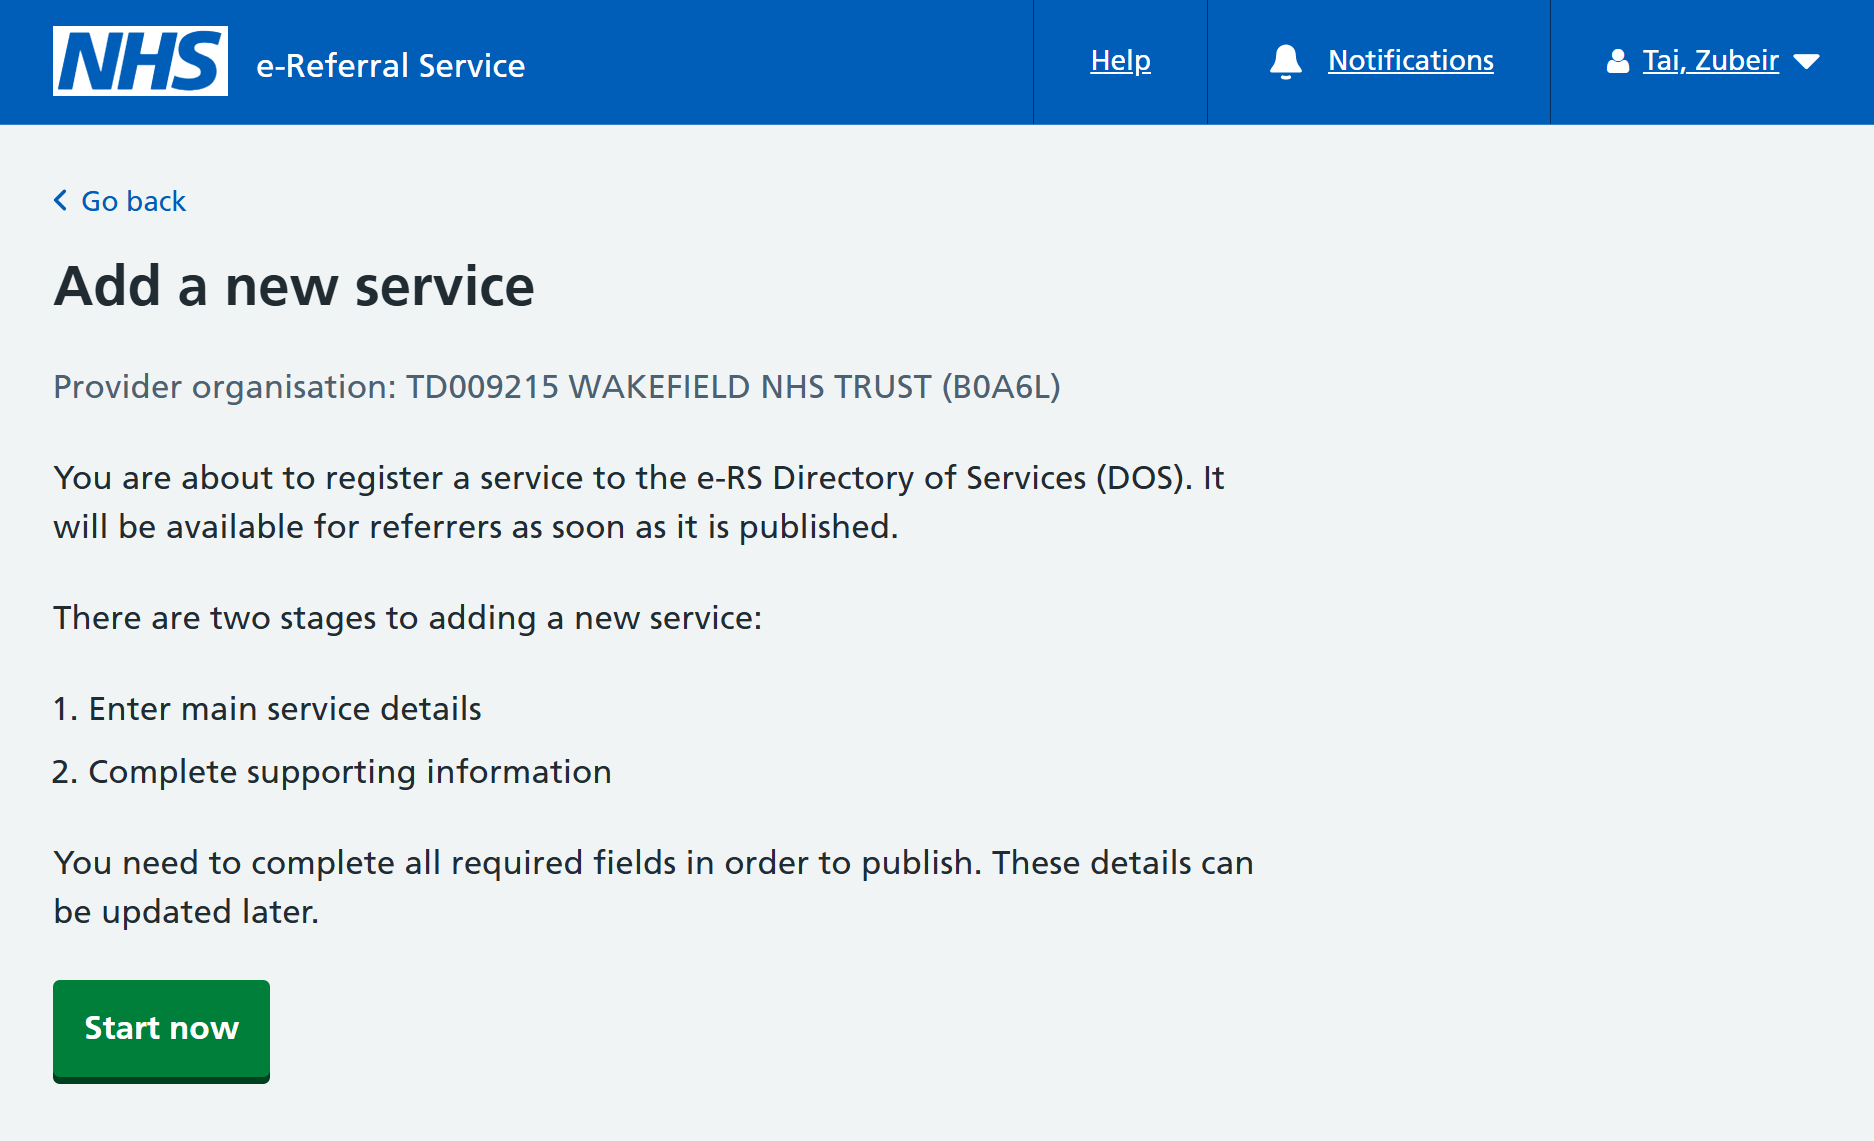
Add a new service
There are two key stages to adding a new service to the e-RS Directory of Services (DOS):
1. Enter main service details - these details are common to all services and includes adding:
- service name and location
- specialty and clinic type
- supported request types
- operational dates
- service commissioning, sex and ages treated
2. Complete any supporting information - these details are specific to the type of service being created. For a triage service this includes adding:
- priorities
- contact information
- users
- notes for referrers
1. Enter main service details
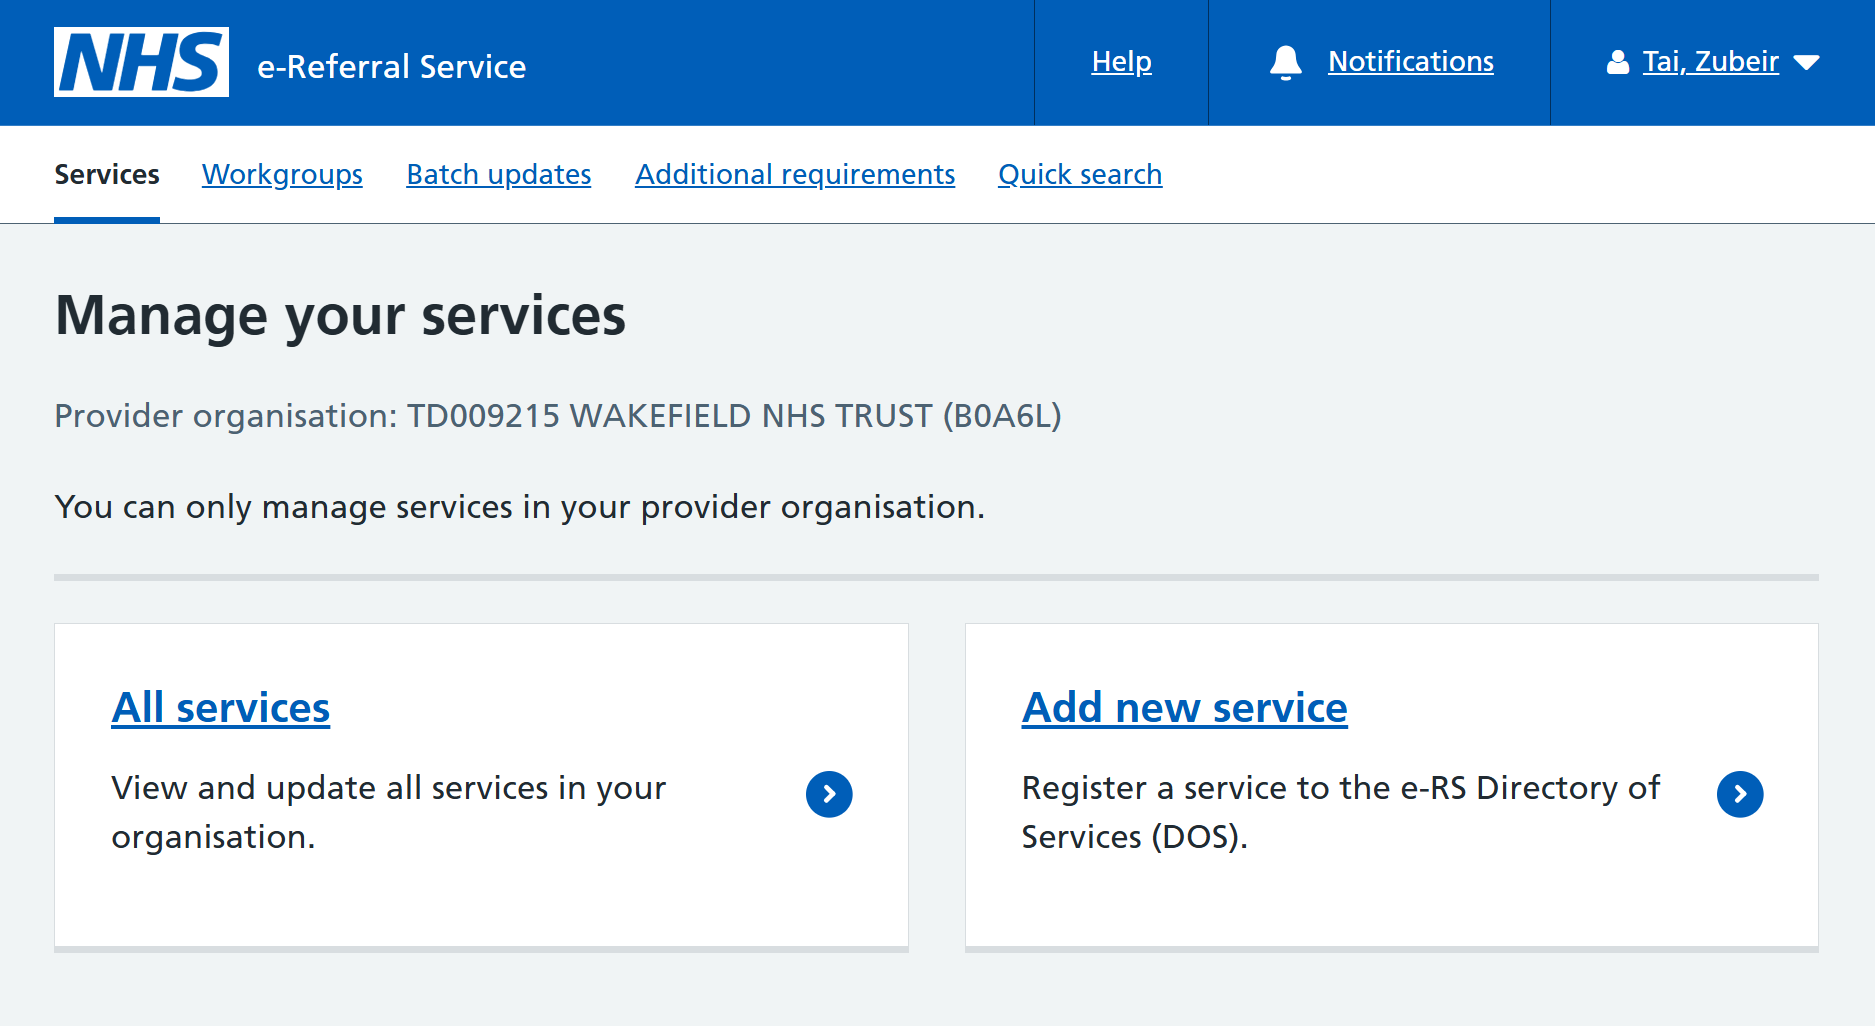
The e-RS web application will default to the ‘Services’ tab upon login. The logged-in provider organisation will be displayed.
Click on 'Add new service'.
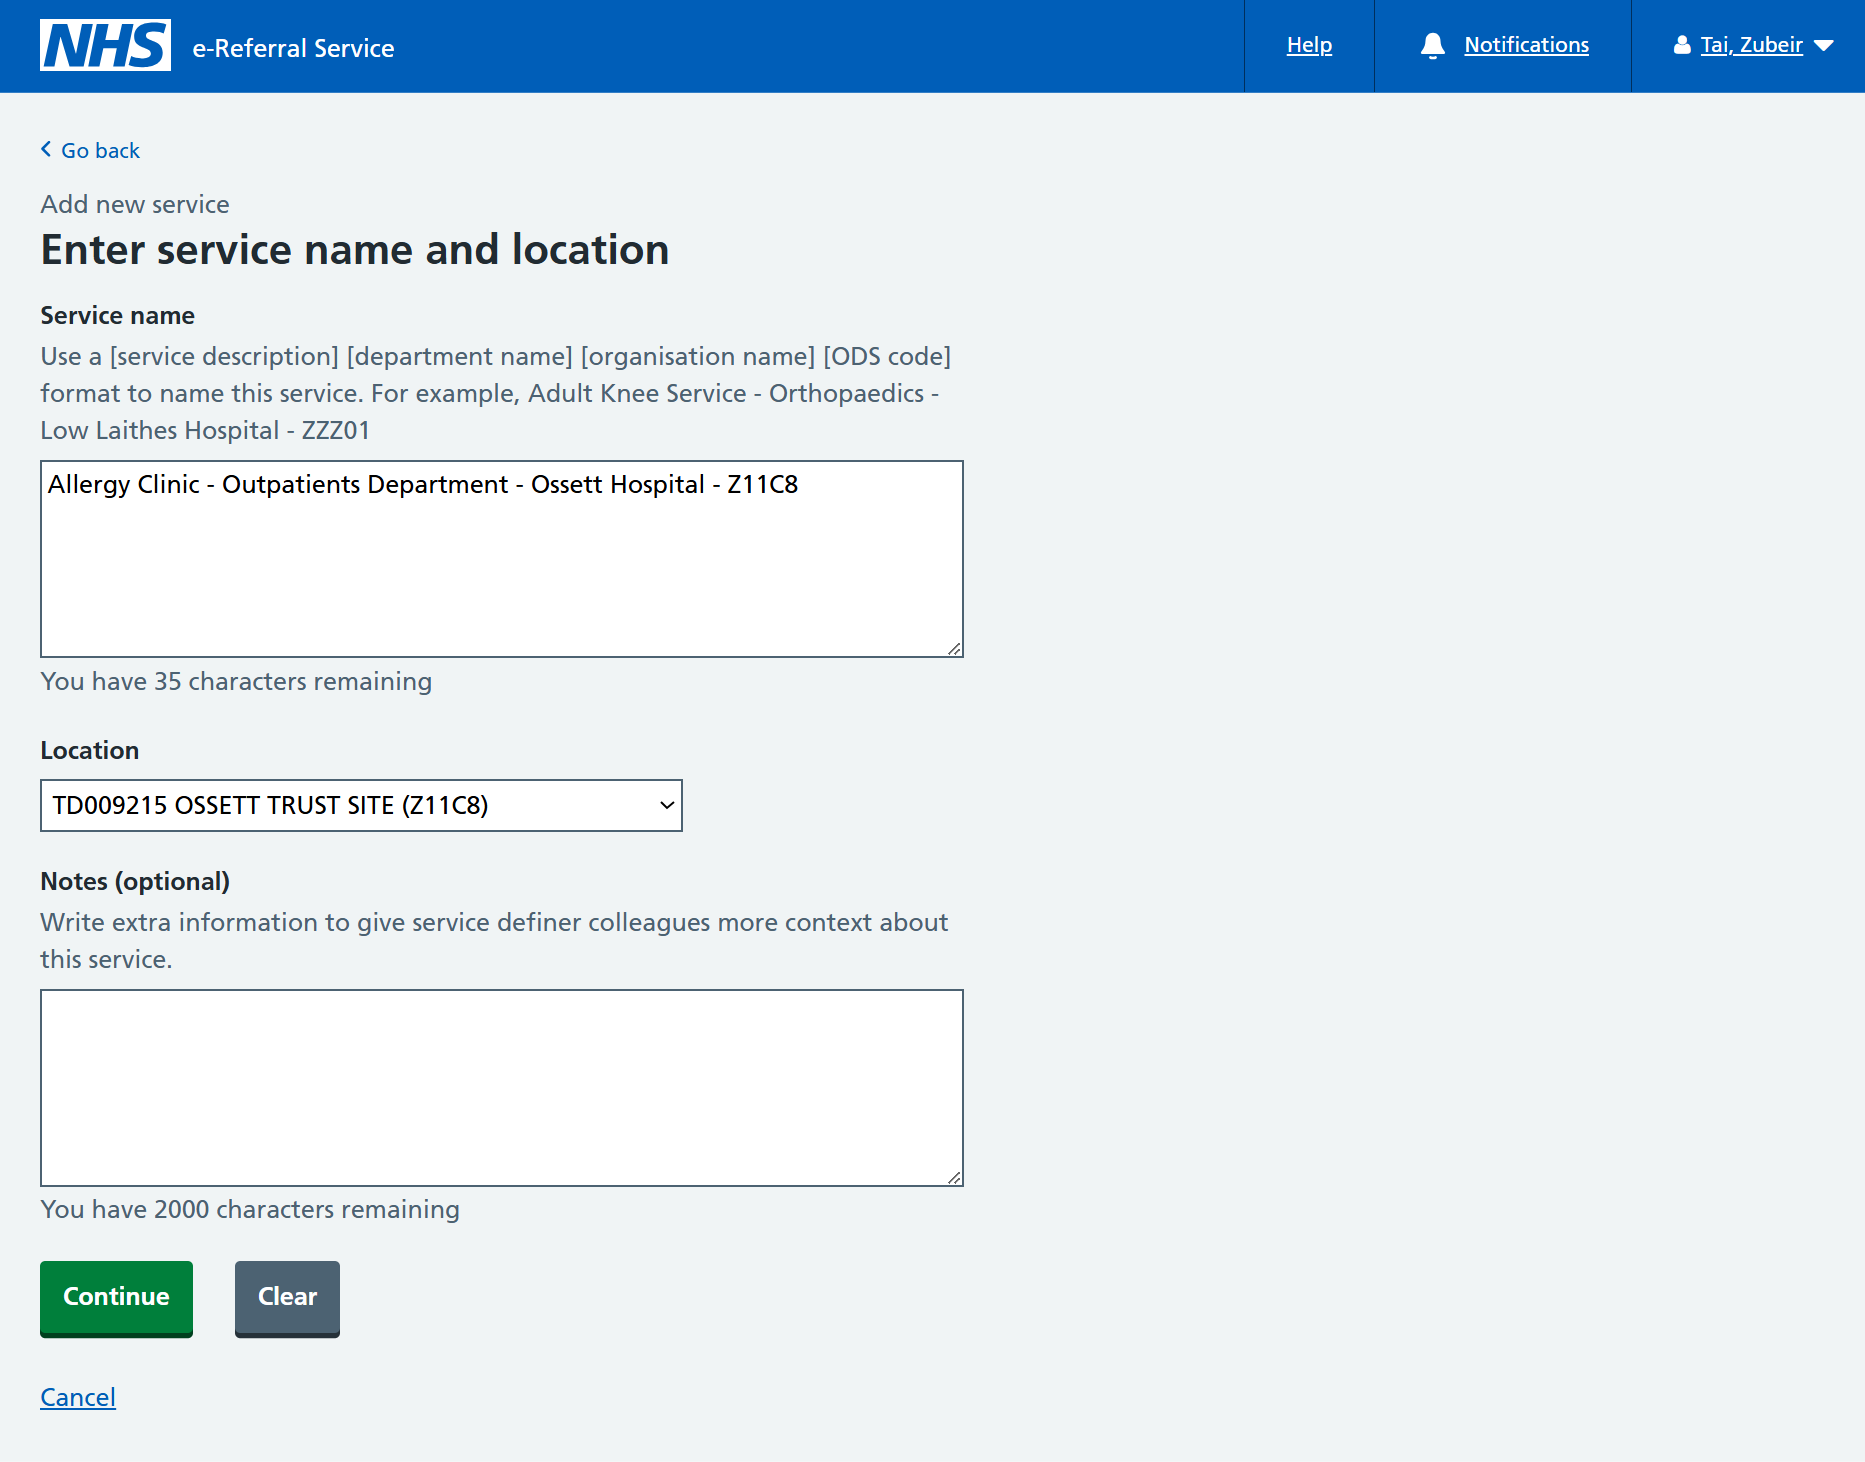
Service name
Enter the name of your service.
It is important that the service name is notable to you, as you will need to identify and select the service when creating referrals for integration testing. Service names must be unique.
Location
The service must be located at a configured trust location.
Select a service location from the drop-down list.
If none are listed, it means no locations have been configured for the trust. Contact the test data team ([email protected]) requesting that locations be created. You will need to provide the:
- trust ODS code
- environment you are working in
Click 'Continue' to progress.
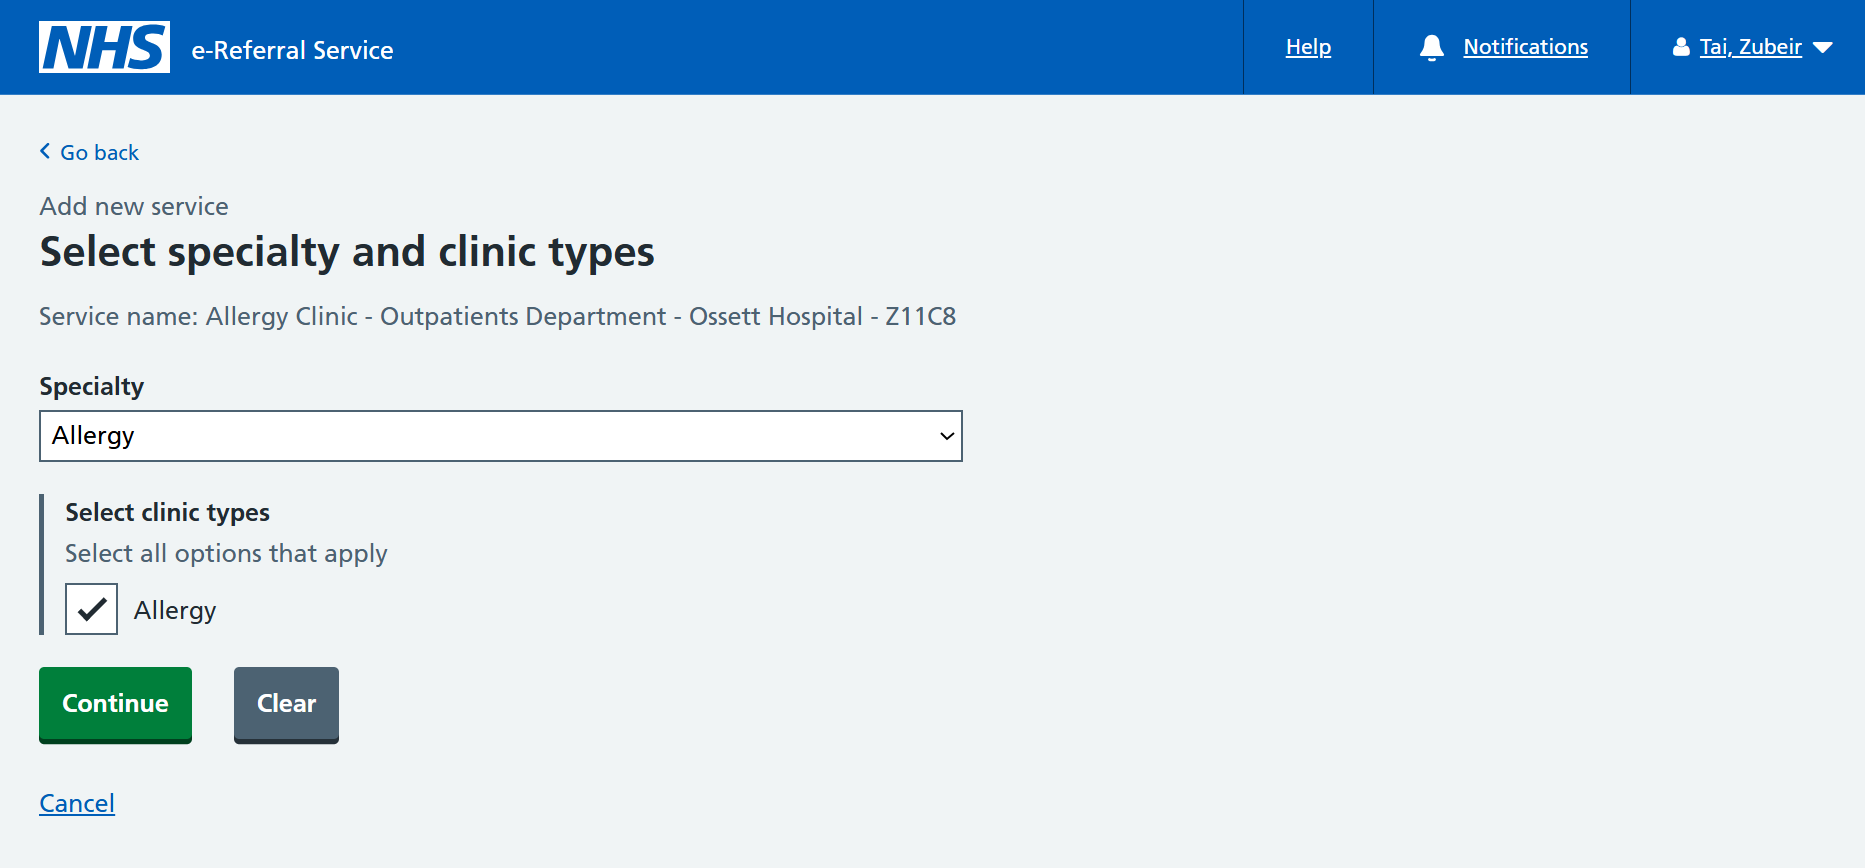
A service must have:
- one associated specialty
- at least one clinic type
This specialty and clinic type video (duration 4 minutes) explains the terms used within e-RS and how the specialty and clinic types are used to locate a suitable service for patient referral.
Select a specialty from the drop-down list and required clinic types from the list.
Click 'Continue' to progress.
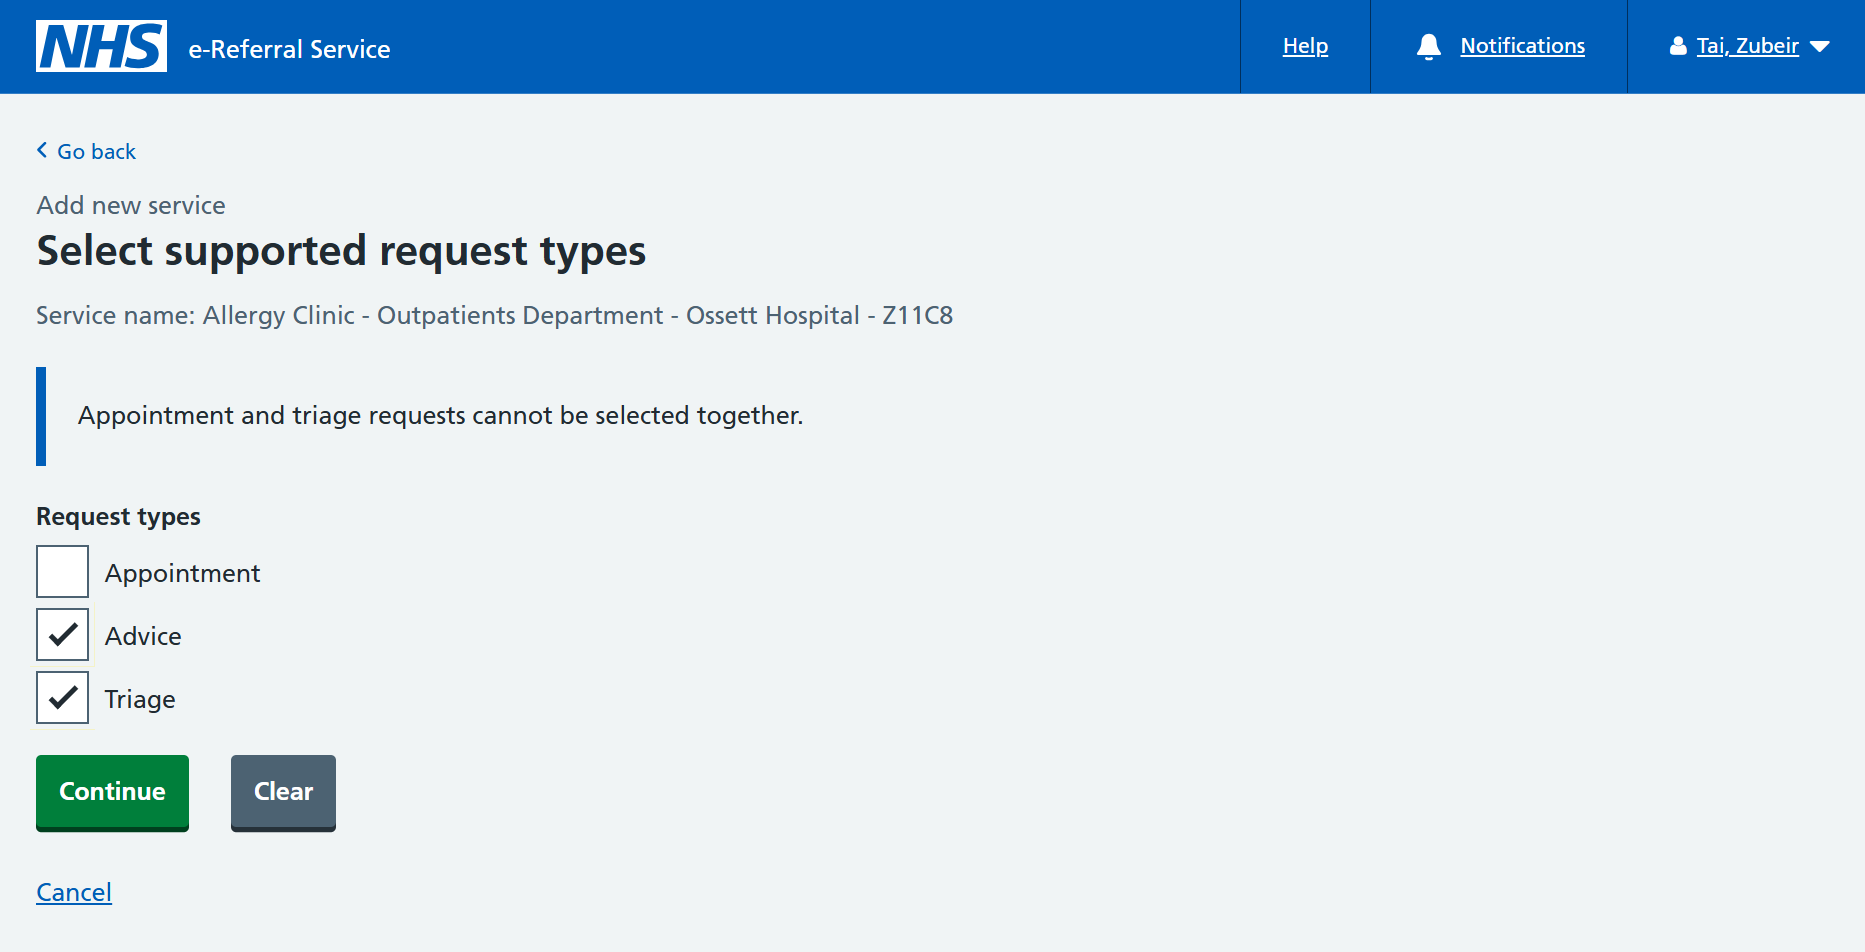
Request types
Select 'Triage' for a triage service, also known as a Referral Assessment Service (RAS).
A service can be both an 'Appointment' and 'Advice', or a 'Triage' and 'Advice'. But a service cannot be an 'Appointment' and a 'Triage'.
Click 'Continue' to progress.
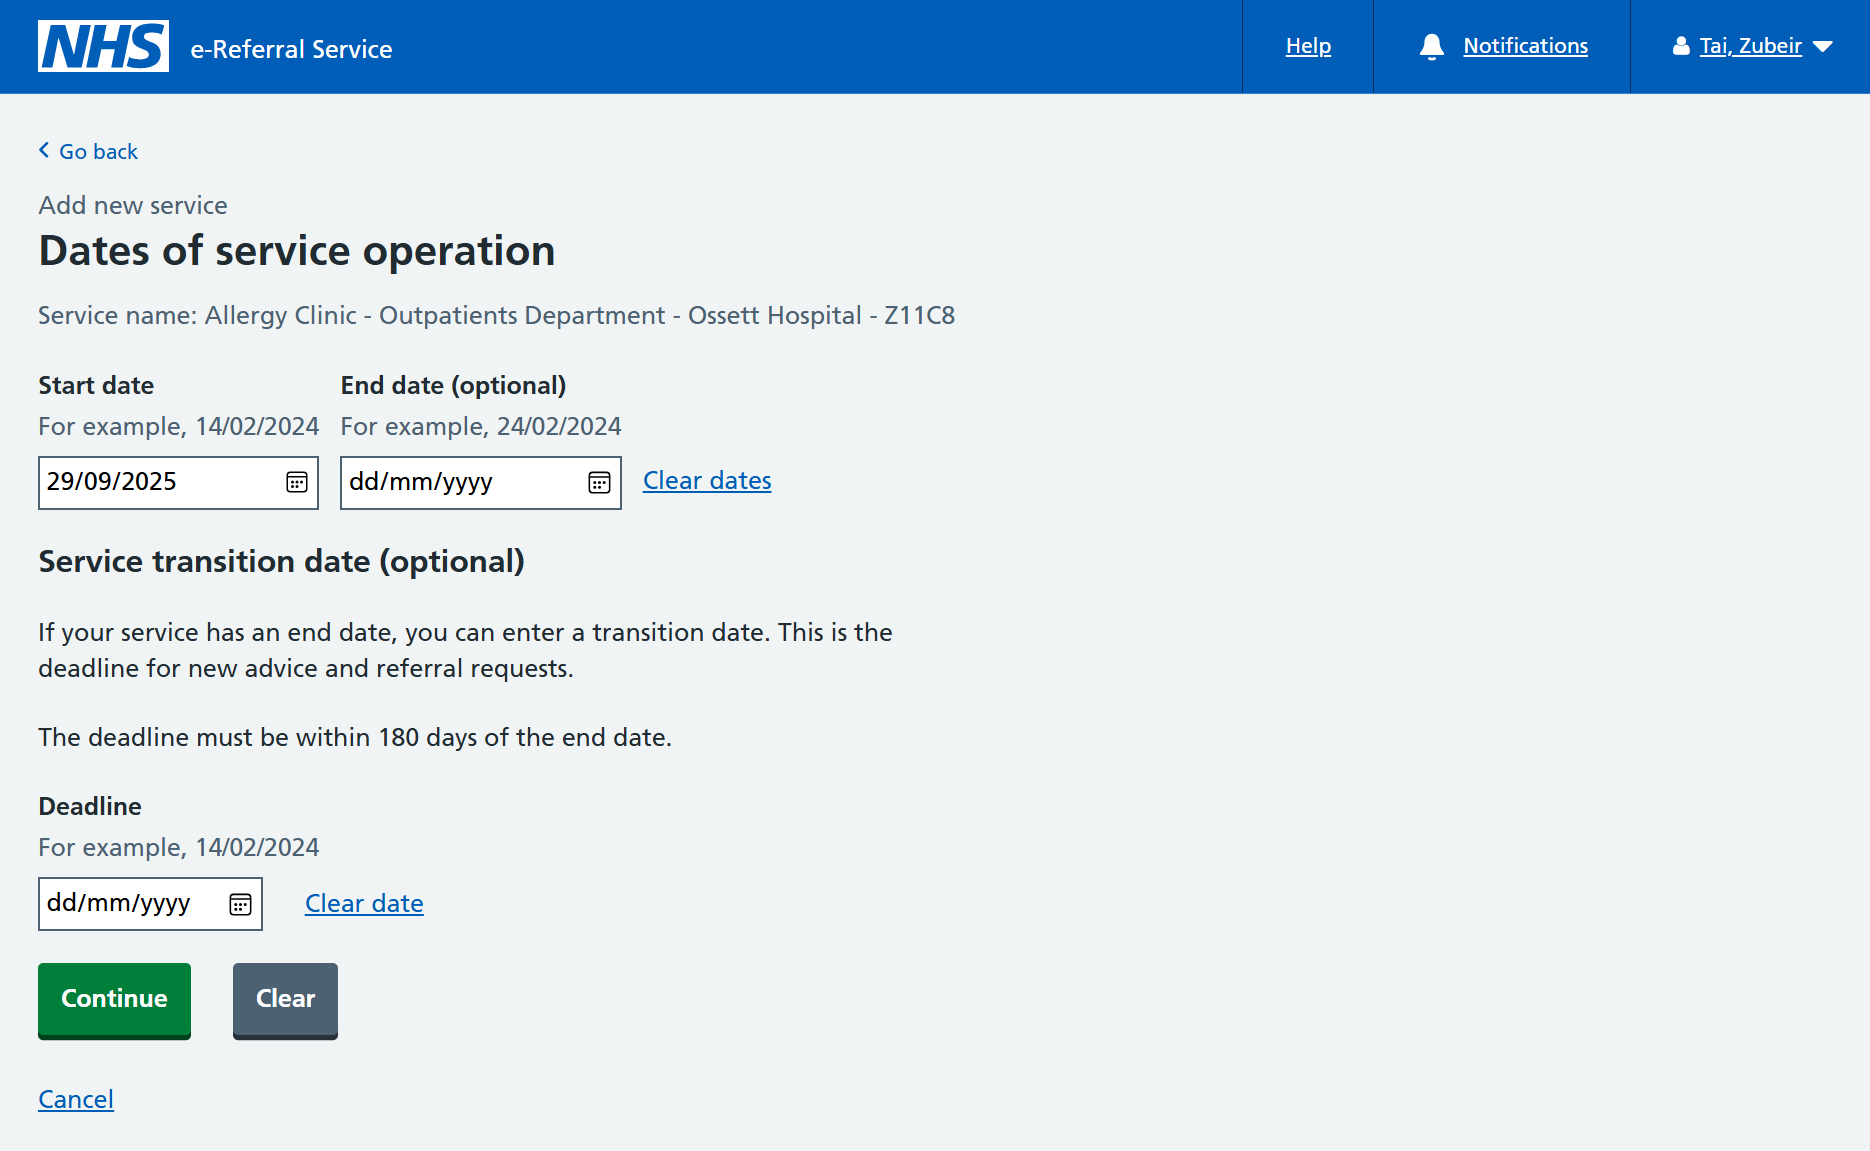
Start date
Your service must have a start date from when it can be referred into.
Select todays date.
Click 'Continue' to progress.
Does the legal right to choice apply?
Select 'Yes'.
You can read more about the legal right to choice using the informational panel.
Click 'Continue' to progress.

Sex treated
This option ensures that services are implemented on a sex specific basis when required.
Select a suitable value for your service.
Click 'Continue' to progress.

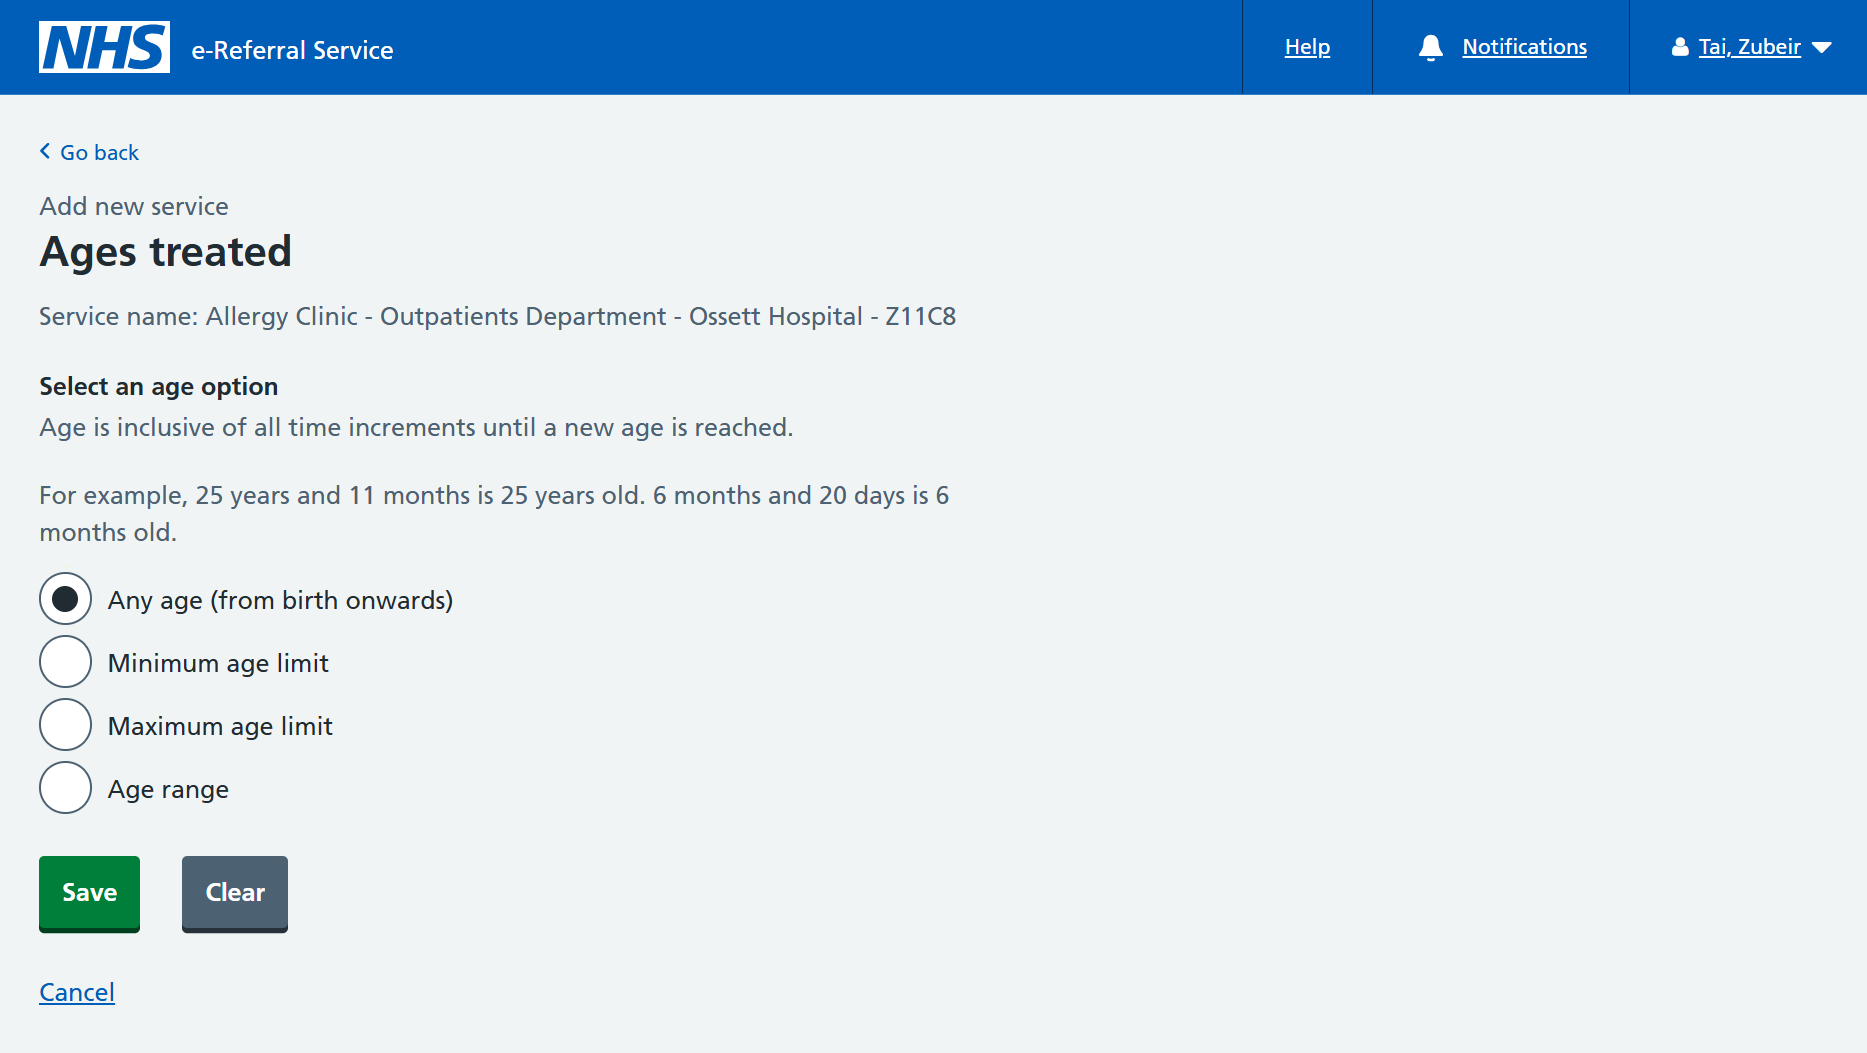
Ages treated
Your service must have an age option to determine suitability.
Select a suitable value for your service.
Click 'Save' to complete the main service details journey.
You will be informed that your service has been saved as a draft, and a Service ID will be generated.
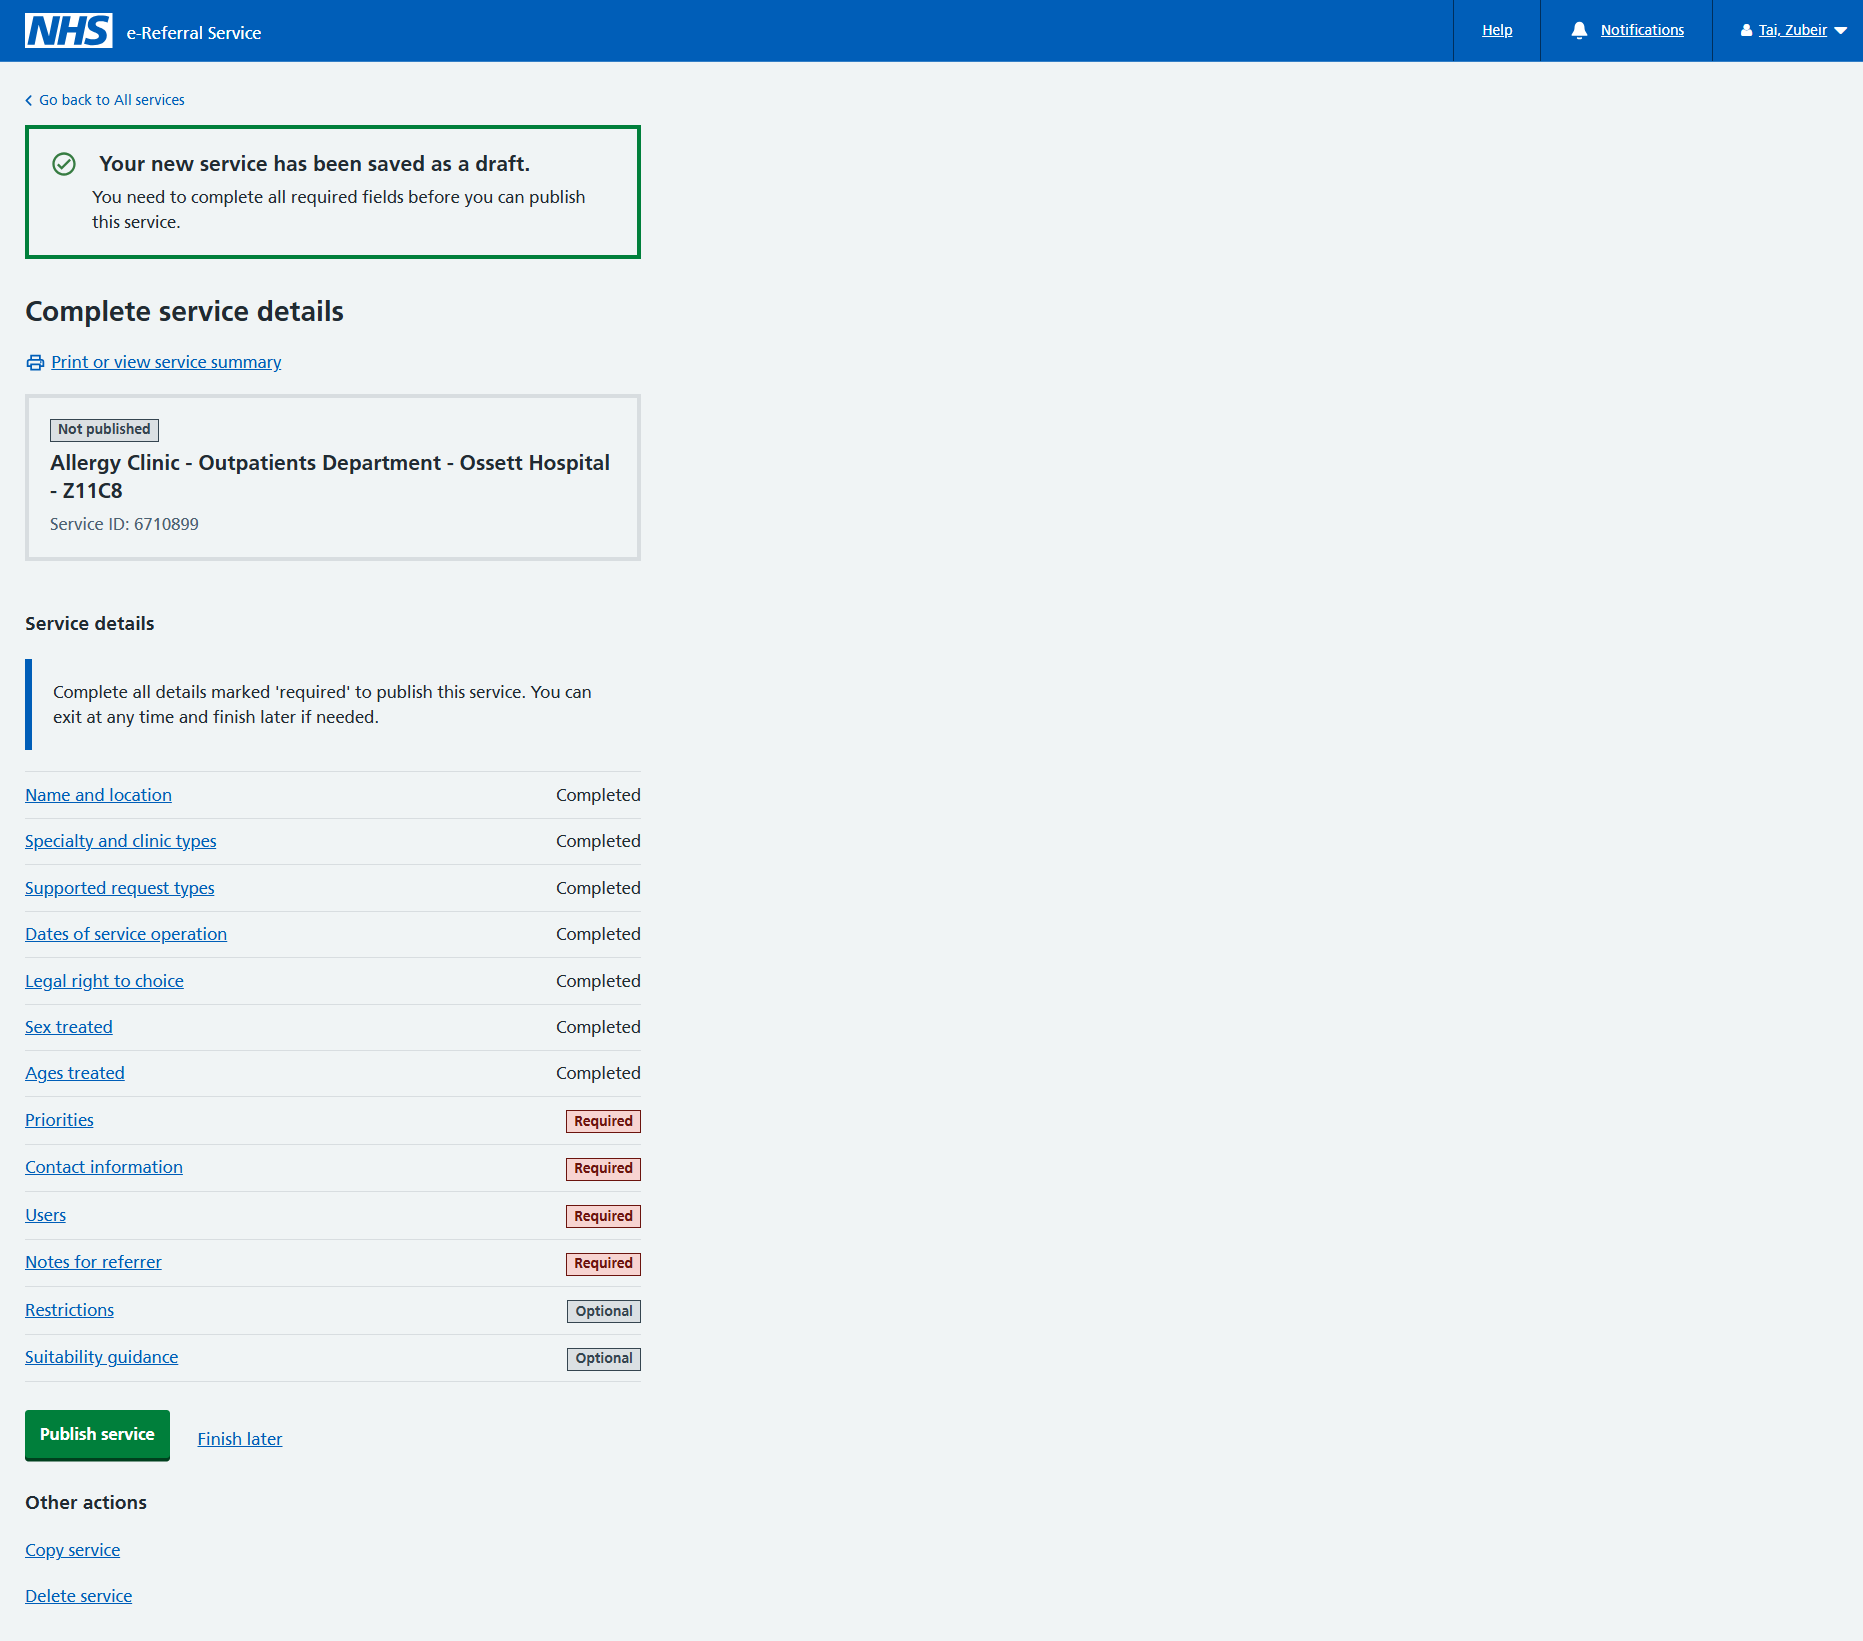
All the required fields must be completed before you can publish your service.
In this case:
- priorities
- contact information
- users
- notes for referrer
The next steps guide you through these mandatory fields.
2. Complete any supporting information
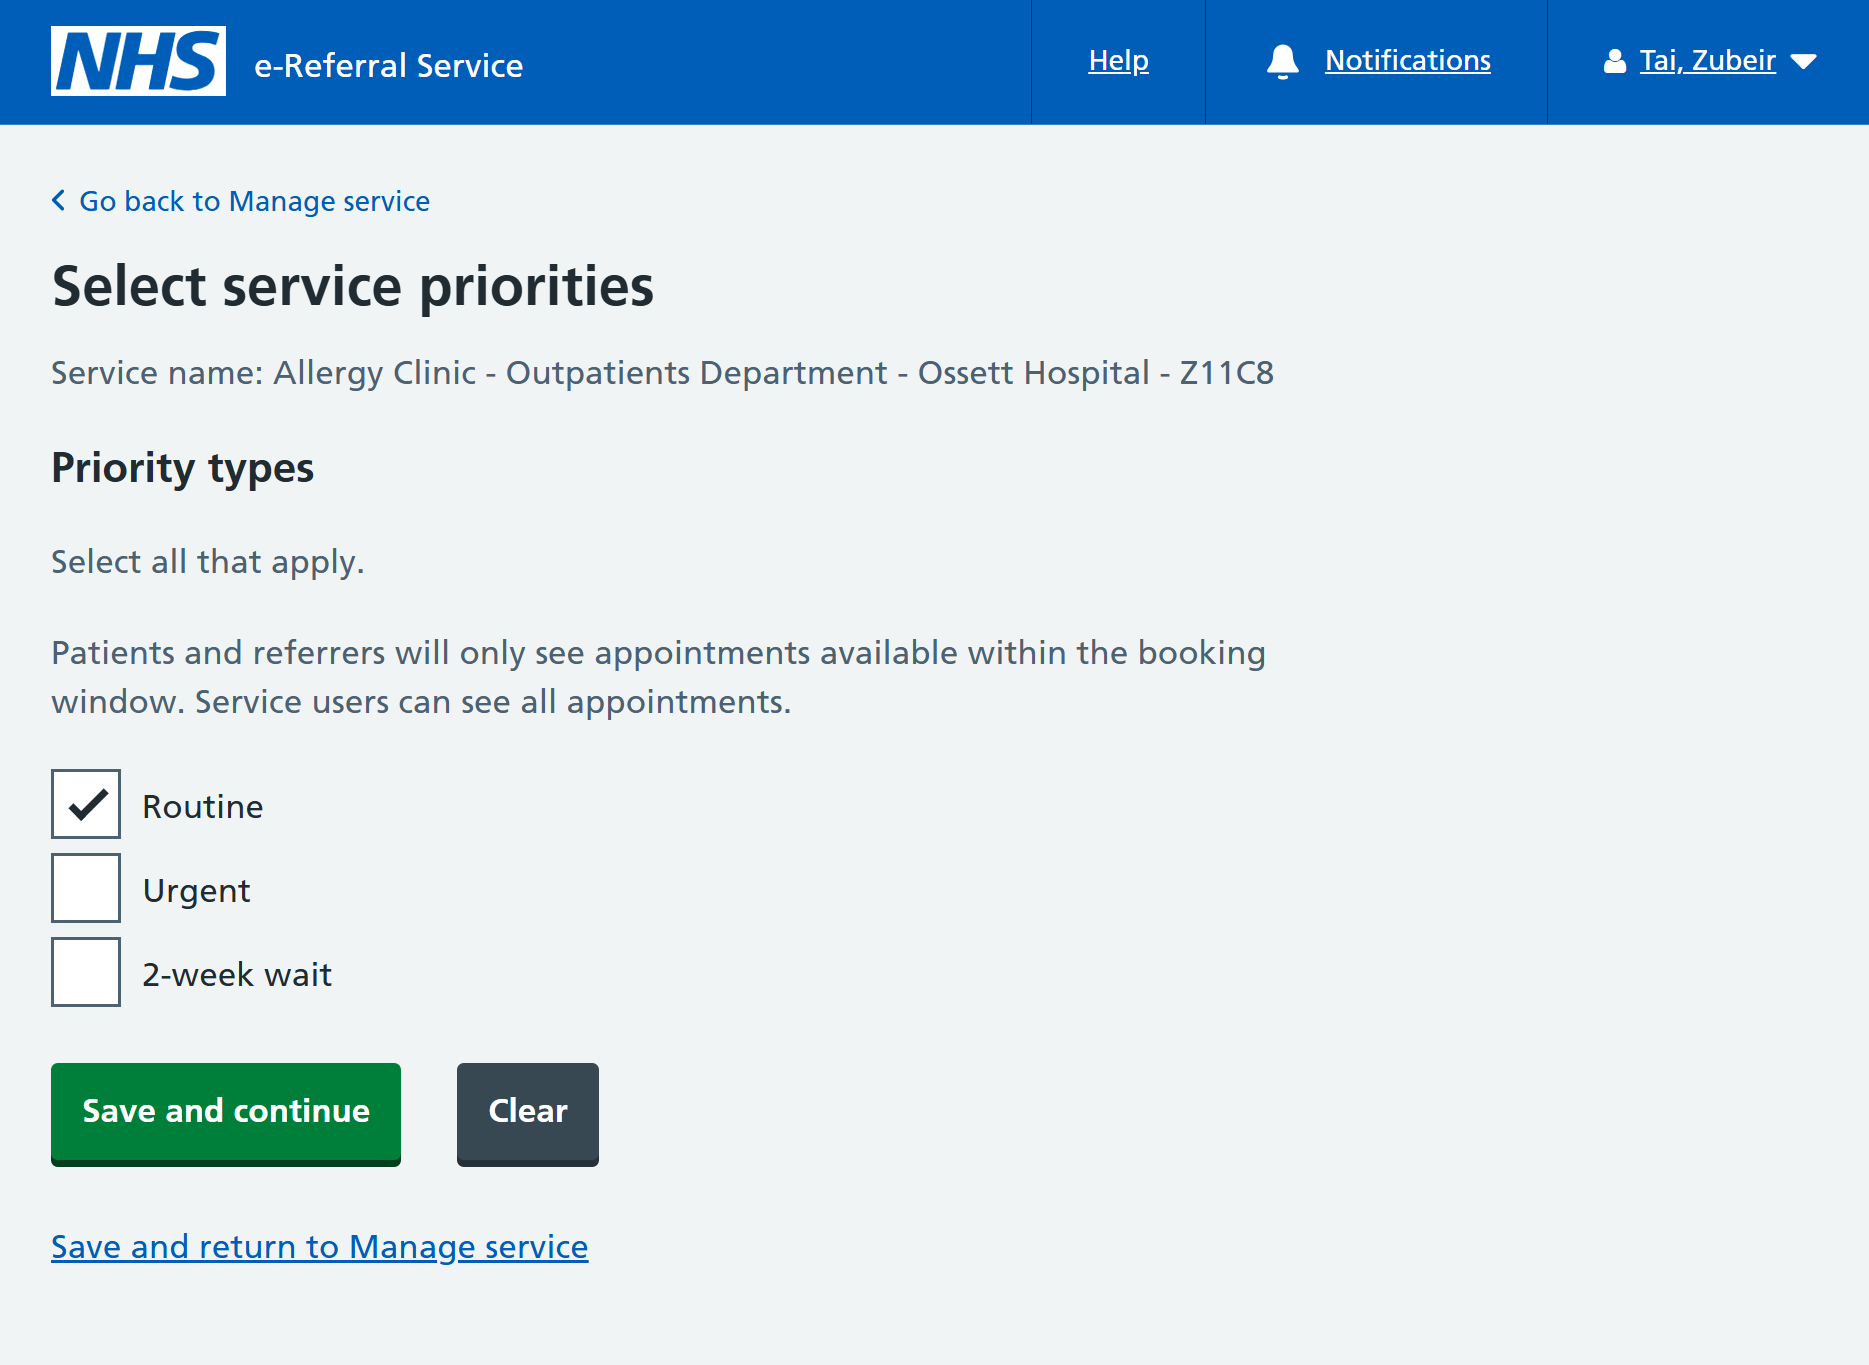
Select the 'Priorities' link from the Manage service page.
Priority types
Select suitable priorities for your service.
Booking window
The patient booking window determines the availability of appointment slots for users booking into your service.
Enter values for the start date as required.
Does the booking window include weekends?
If the service operates during the weekends, then this can be configured here.
Select values as required.
Click 'Save and continue' to move onto the next section.
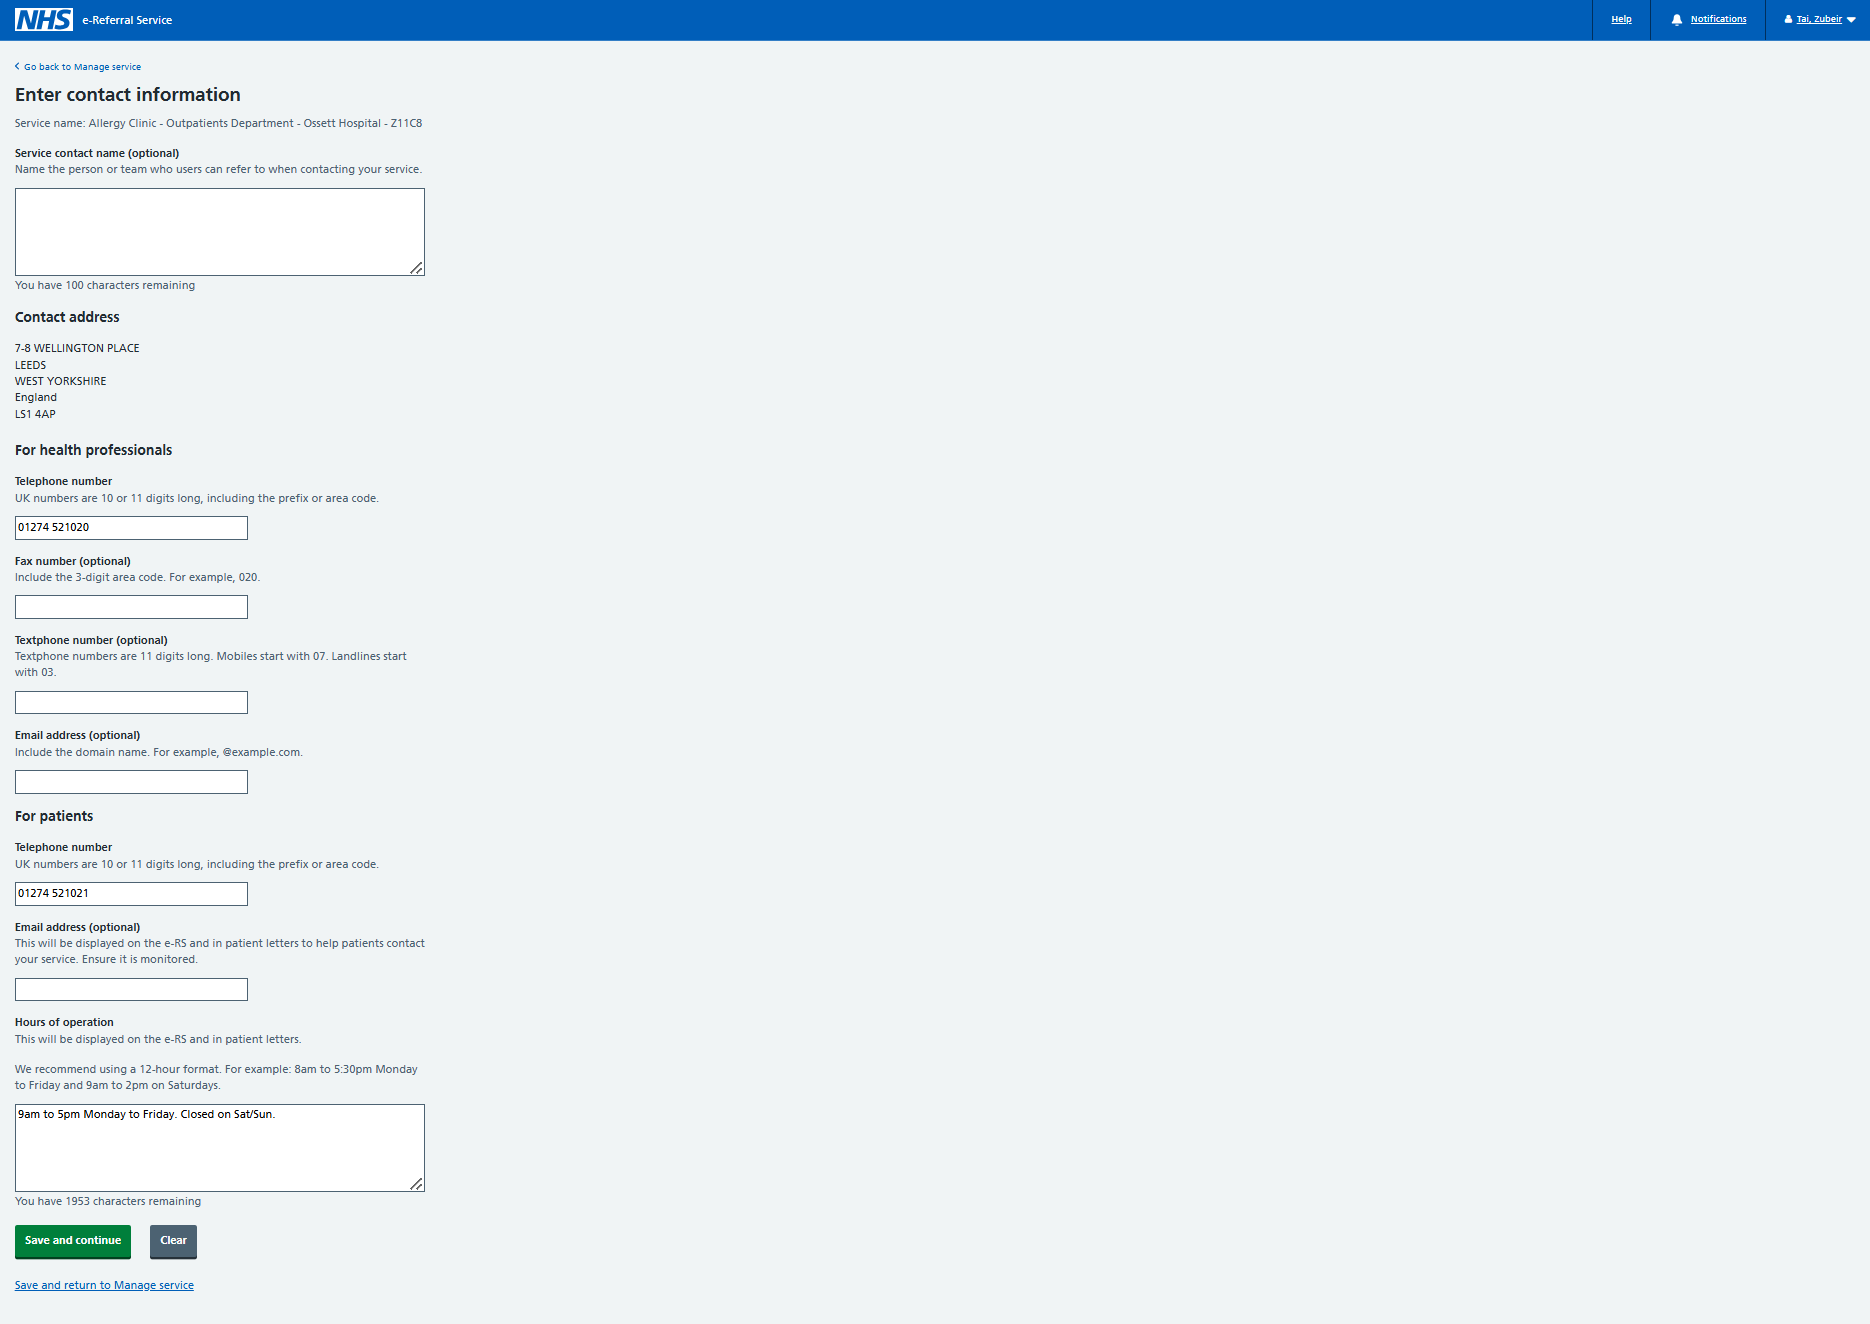
Contact information for the service is vital to ensuring both health professionals and patients can get assistance, when required.
For health professionals
Enter a valid telephone number.
For patients
Enter a valid telephone number and typical hours of operation.
Click 'Save and continue' to move onto the next section.
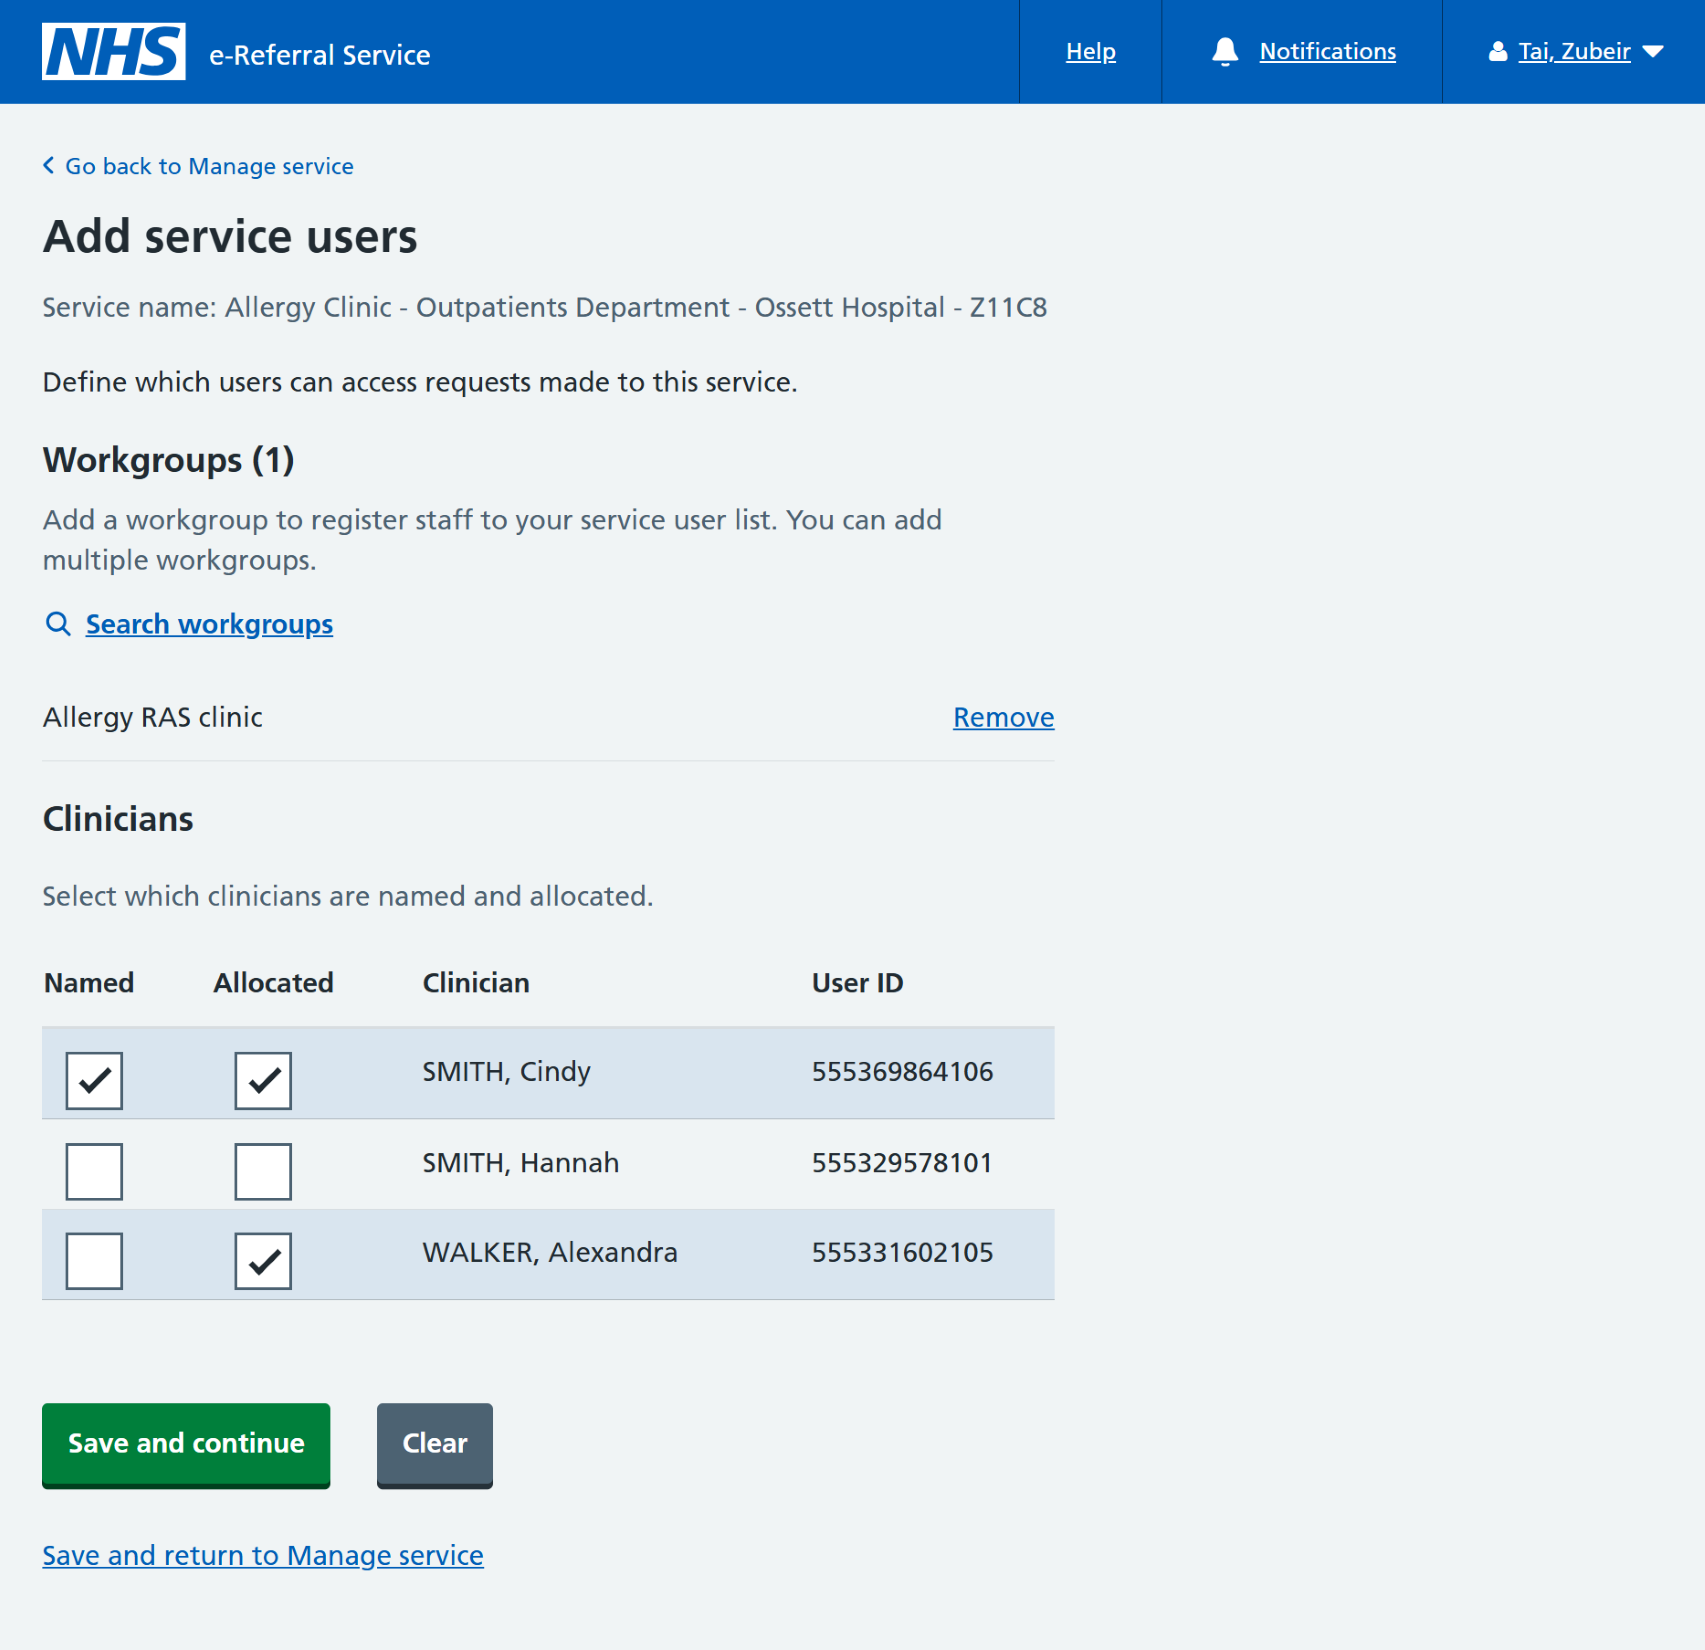
This section determines which users can access referrals made to this service.
Search and add the workgroup you made in the previous chapter.
Named and allocated clinicians
A clinician can be:
- allocated only
- both allocated and named
A clinician cannot be named without being allocated.
A named clinician is a clinician that a referrer can search for and select when shortlisting and booking services. A named clinician must also be an allocated clinician, meaning the appointment will either be with that clinician or under their responsibility. Where a clinician is defined as an allocated clinician only, then it is not possible to refer directly to them. However, users can still filter referral requests by that clinician on referrer worklists.
Click 'Save and continue' to move onto the next section.
Do you want to include a note for the referrer?
The answer to this question is mandatory but no notes need to be provided.
Select 'No'.
Click 'Save and return to Manage service'.

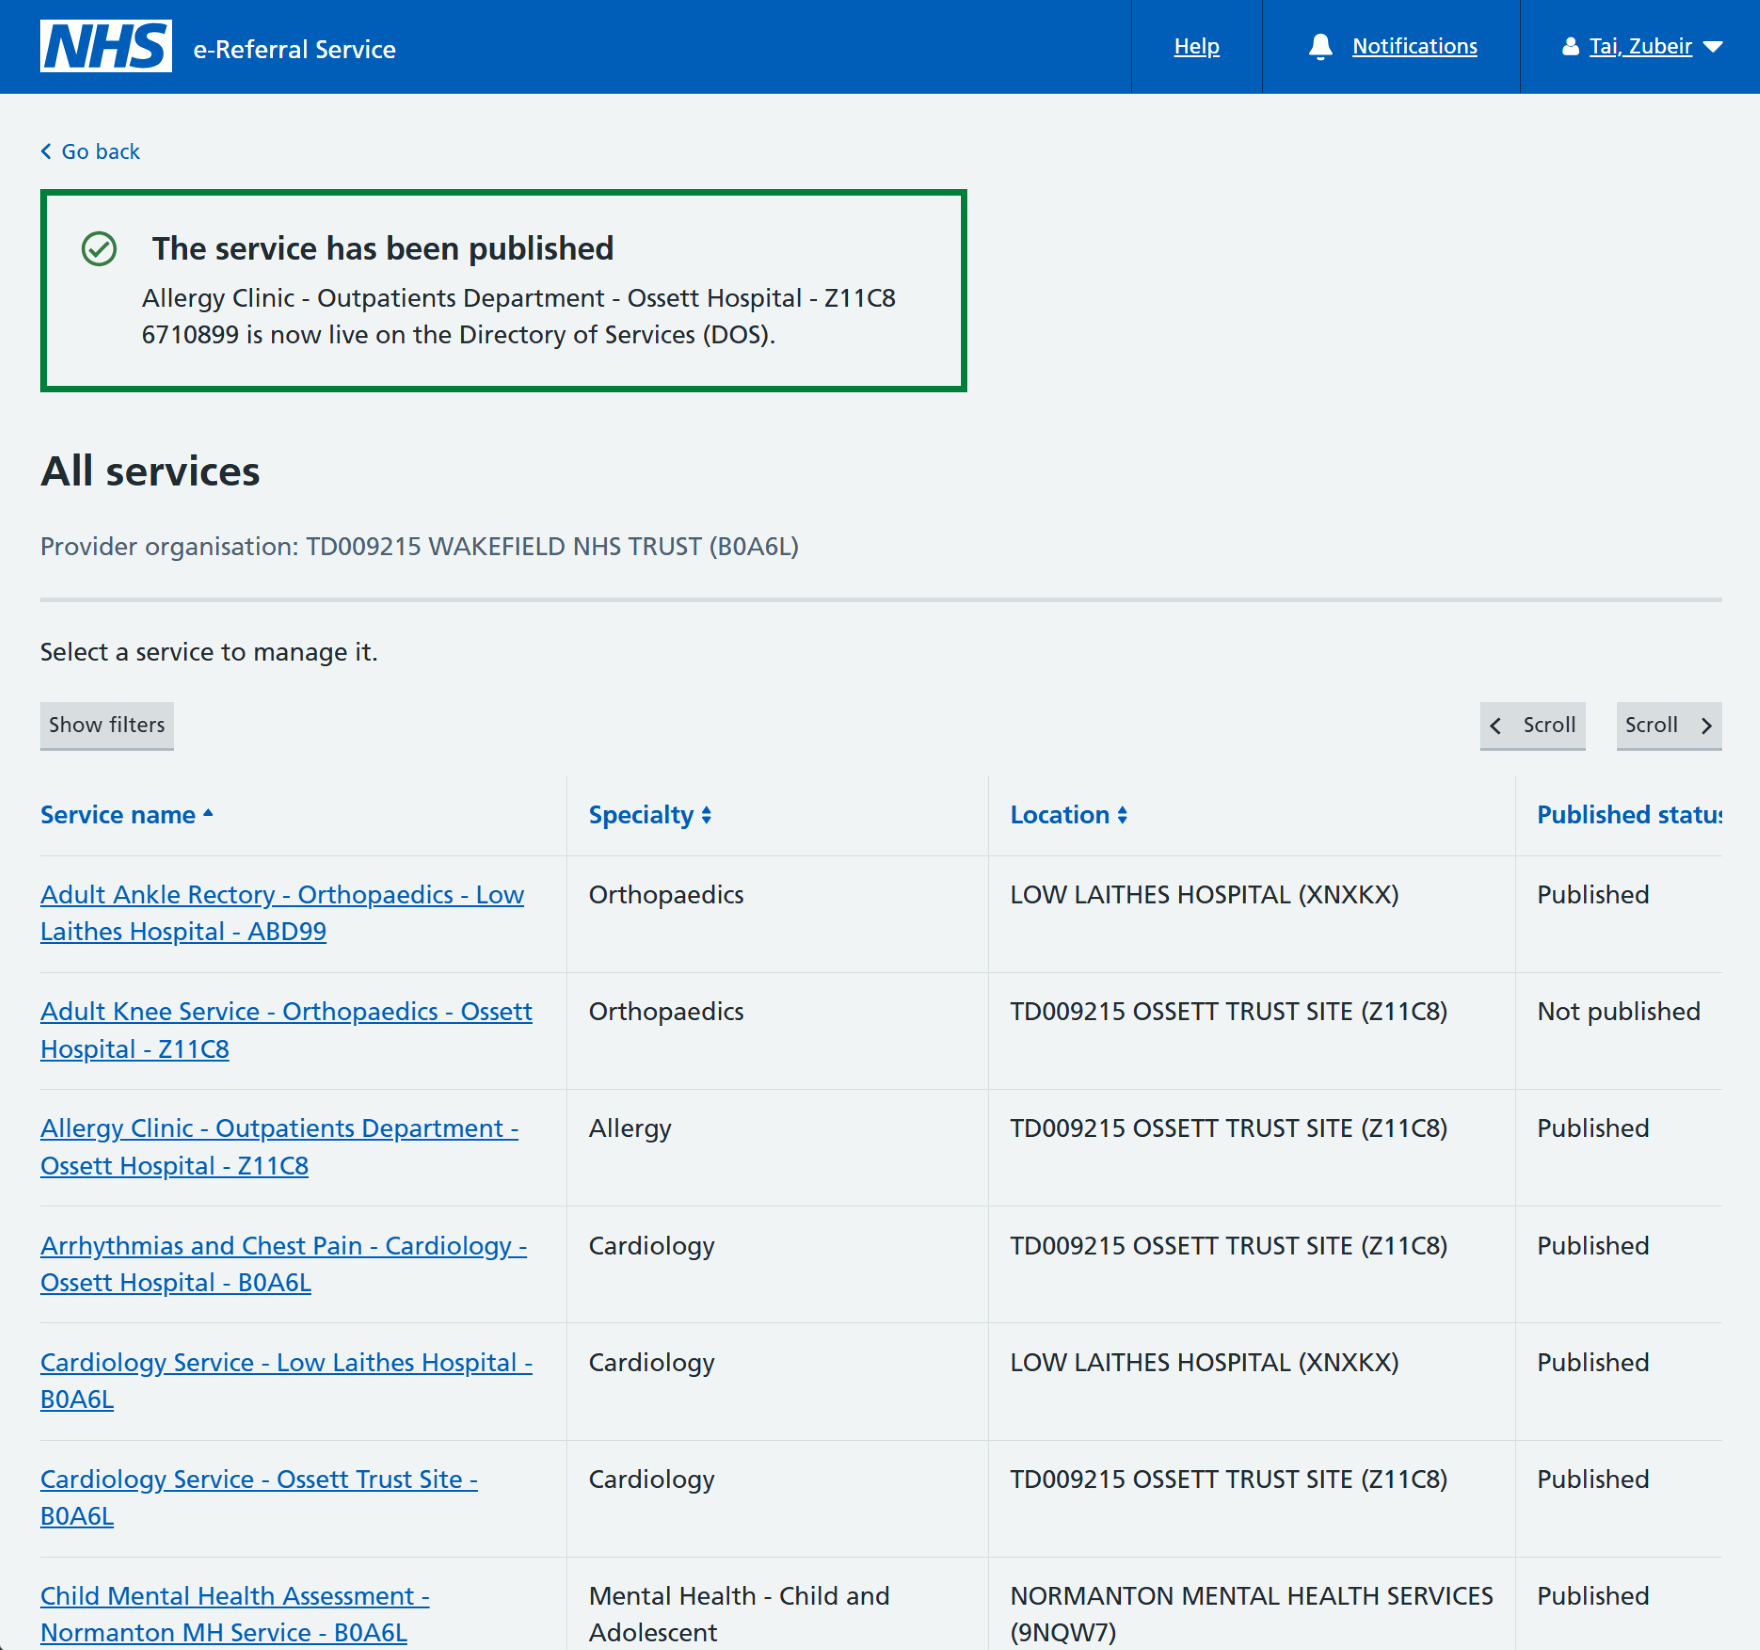
Once all the mandatory sections are complete, you will be informed that the service is ready to be published.
Click 'Publish service' from the Manage service page, then 'Save' to confirm.
Your service is now ready and available for referrals.
- service name and location
- specialty and clinic types
- supported request types and priorities
- sex/age treated
Last edited: 5 January 2026 11:28 am