User guide for Feasibility Self-Service tool
We offer safe, secure access to patient data and provide one-to-one support to help your trial run smoothly and efficiently. Our services can support you at every stage of the clinical trial process.
- How to access Feasibility Self-Service
- How to use Feasibility Self-Service
- How to export your results
- About the metadata in Feasibility Self-Service
- Feasibility Self-Service Business Rules
The Feasibility Self-service tool contains 4 datasets. These are:
- Personal Demographics Service (updated daily)
- Hospital Episode Statistics (HES) - Admitted Patient Care (updated monthly)
- Hospital Episode Statistics (HES) - Outpatient (updated monthly)
- Medicines dispensed in primary care (updated monthly)
Only specific elements relevant to feasibility assessments, such as diagnoses and procedures, are displayed.
The tool does not contain GP codes and related data.
Currently, it’s not possible to distinguish which integrated care board (ICB) or hospital provided a specific diagnosis. For example, if a patient is seen at different hospitals for different diagnoses. The data is linked to the ICB associated with the patient's GP practice or postcode. Whether results are displayed by ICB, region, or partial postcode, the data is always based on the GP practice's location.
How to access Feasibility Self-Service
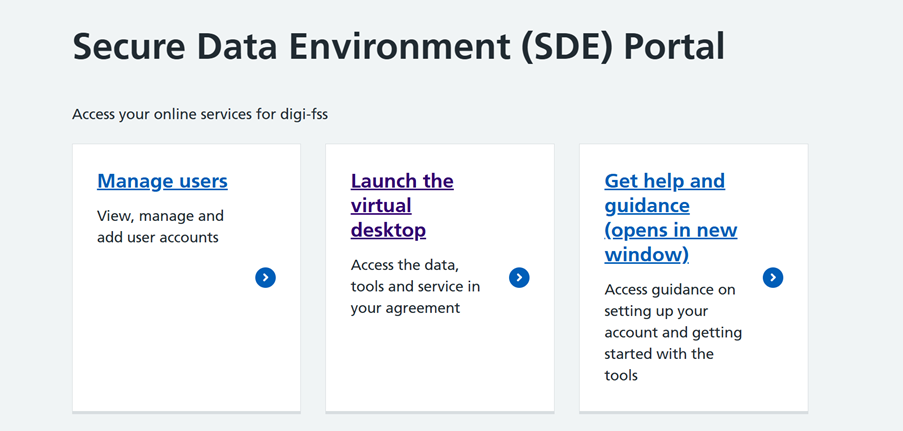
Once you are logged in to SDE you will see a list of your agreements. Select the agreement you want to access.
On the next page you need to select the ‘Launch the virtual desktop’ option.

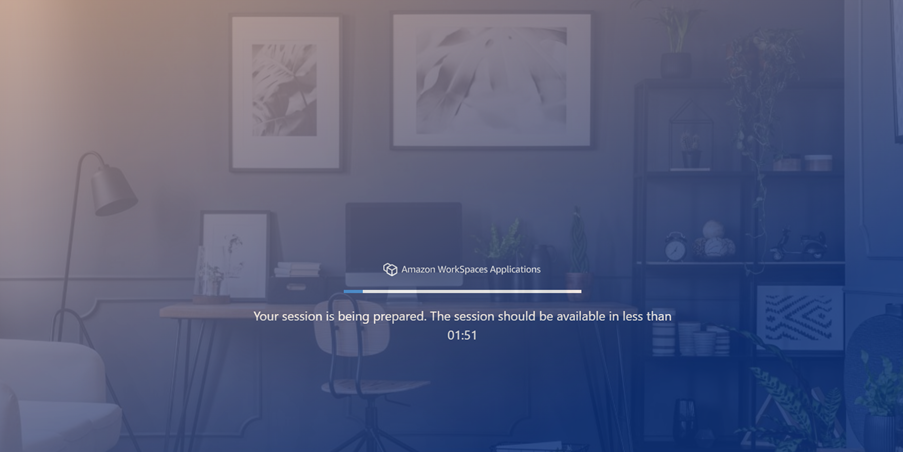
The virtual desktop will load, note this may take a couple of minutes. SDE is allocating resources to set up a virtual computer in the cloud for your session.
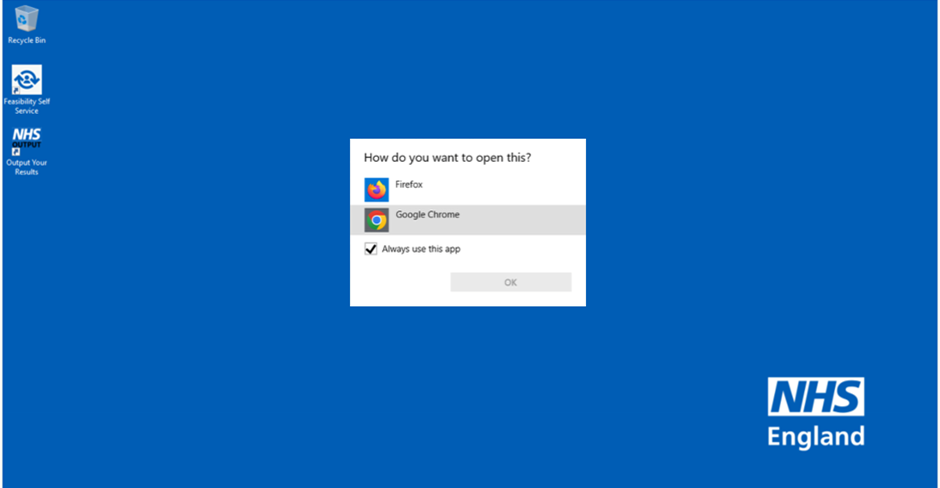
The virtual desktop will load a Windows desktop, here you need to double click, or right click and select open on the icon for Feasibility Self Service.


A small new window (see screenshot) will launch asking you to choose the browser to open the tool. Please select Google Chrome to open the tool and press OK.
Use your SSO Databricks login. This will automatically be set up when your access to the tool was activated.
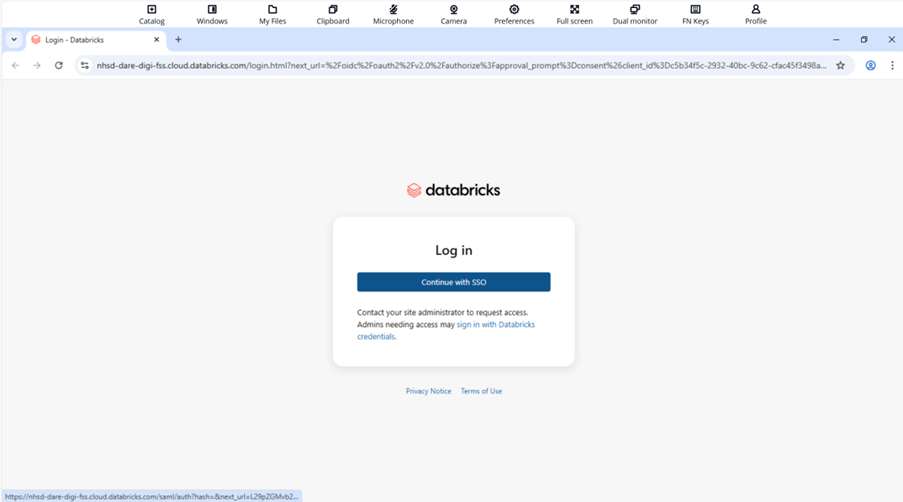
Within the Chrome browser you will be asked to log in again to be able to access the Feasibility Self-Service. The credentials to enter here are your SDE credentials that you used during the SDE log in process.
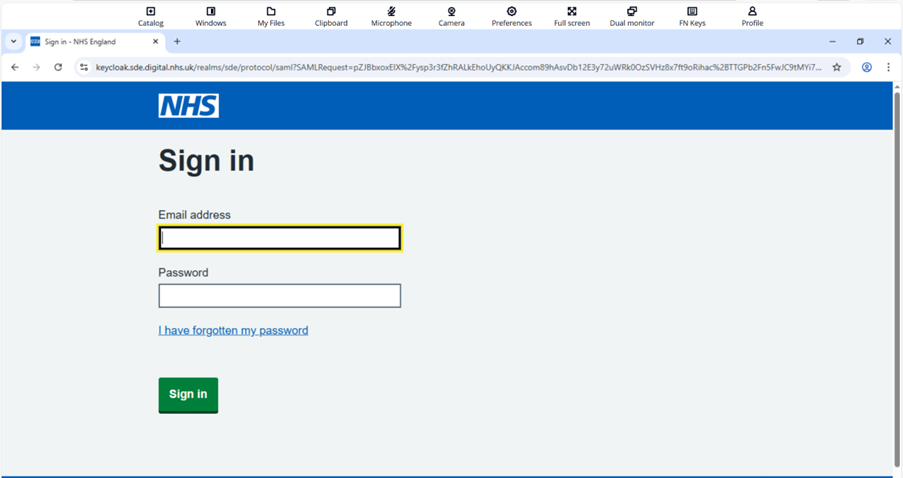
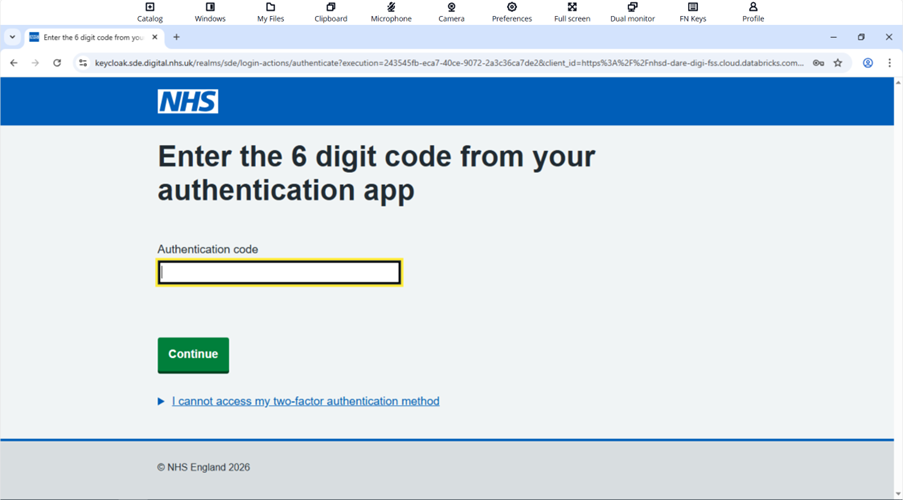
As before with the SDE log in, you will also be required to go through the two-factor authentication step.
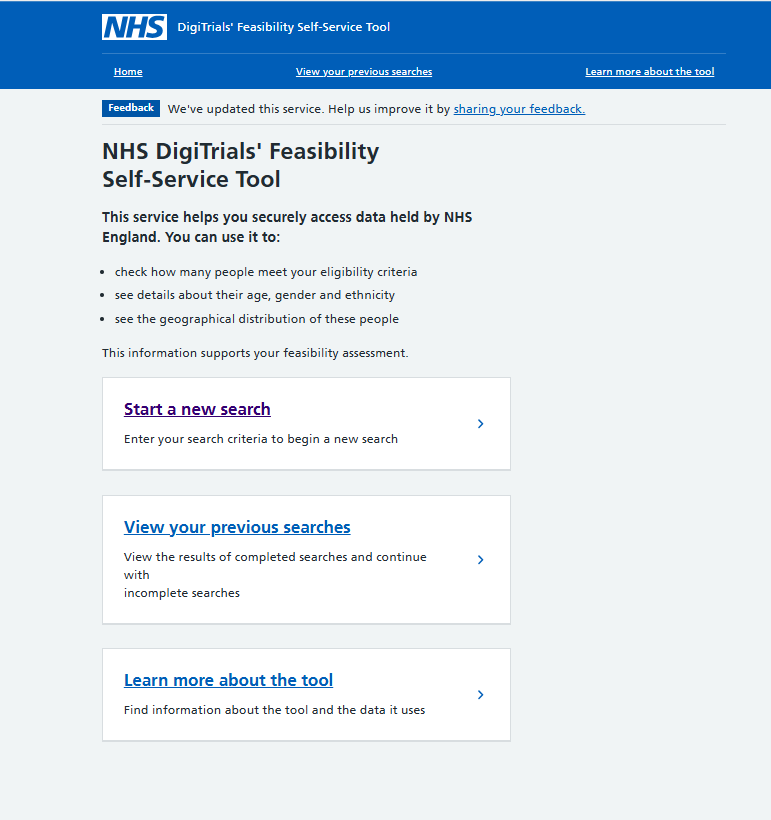
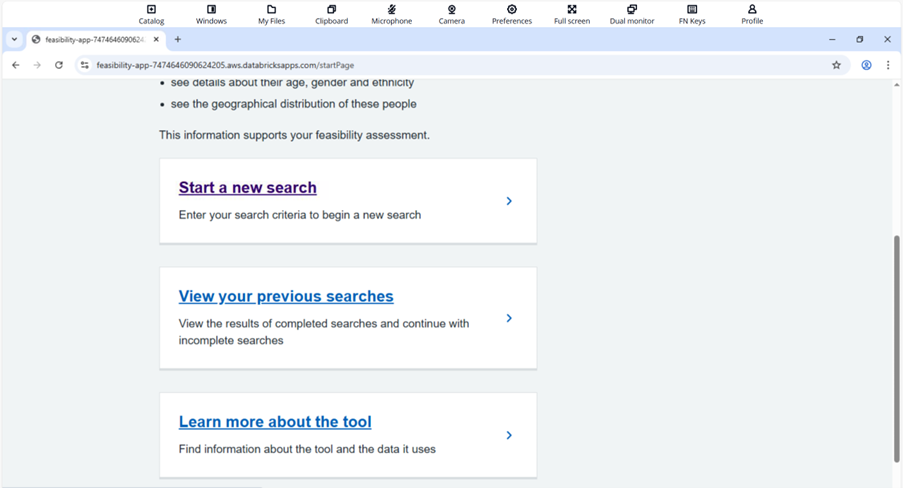
Once log in is successful you will be redirected to the Feasibility Self-Service tool. You will be able to Start a new search and View your previous searches and Learn more about the tool.

Each subscription allows access for up to 3 users. To accommodate more users, you would need to purchase additional subscriptions.
We don’t offer a free trial period for the Feasibility Self-service tool, but if you are interested in using it, we can arrange a demonstration to help you assess its features.
How to use Feasibility Self-Service
This video:
- provides an overview of the tool
- describes how to enter demographic criteria
- describes how to enter inclusion and exclusion criteria
Welcome page
The welcome page provides information about Feasibility Self-Service. In Learn more about the tool, you will see a diagram explaining where we get our data from, and more information about the data and codes used in the service.
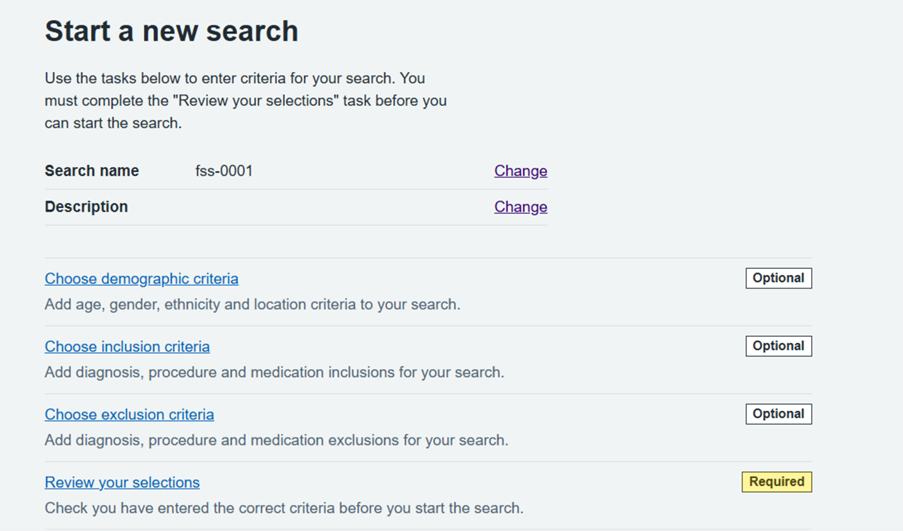
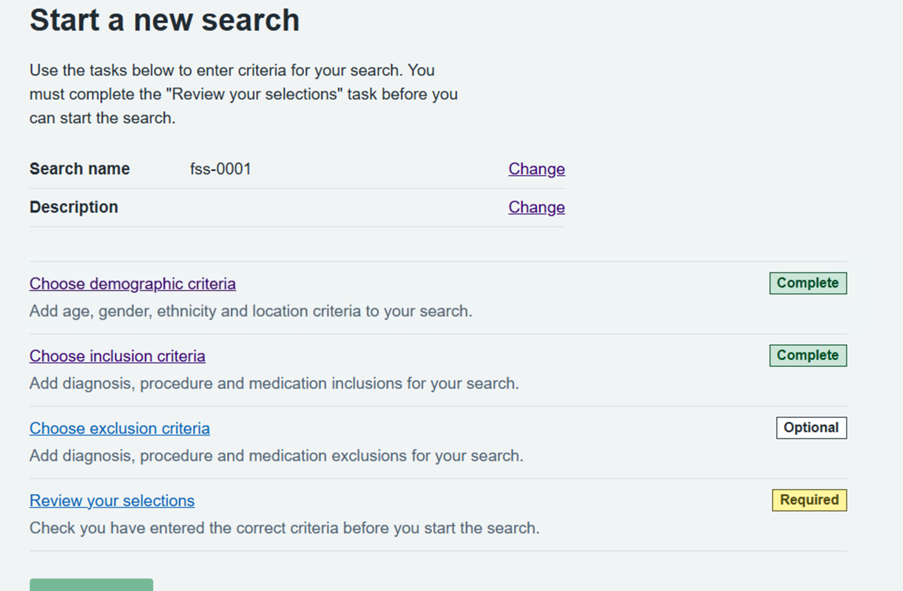
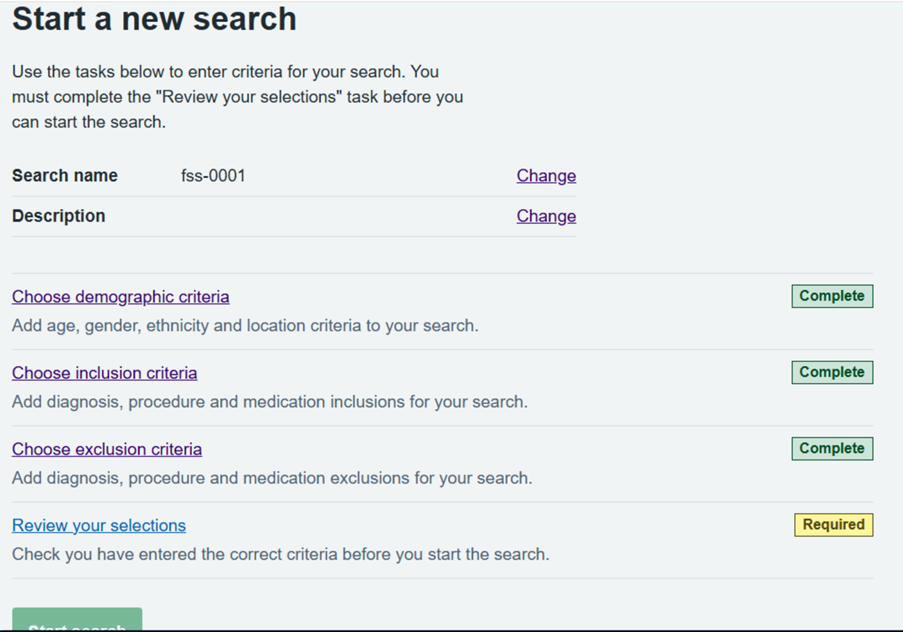
Start a new search
The Start a new search page is where you can run queries to evaluate the feasibility of your study.
The search is broken down into a number of steps:
- Demographic Criteria (Age range, Gender, Ethnicity and Region).
- Clinical Inclusions – Diagnoses, Procedures and Medications.
- Clinical Exclusions – Diagnoses, Procedures and Medications.
- Review your selections – you are required to review your selections prior to running your search.
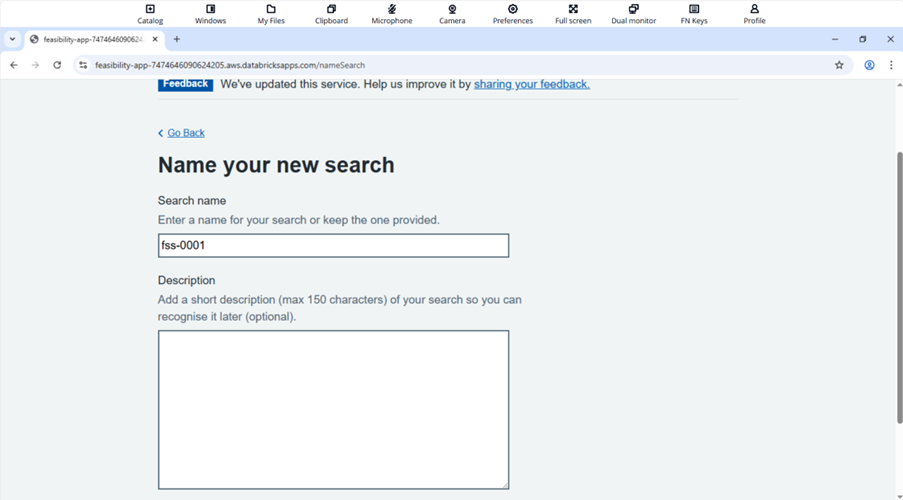
Firstly, you can name your search and add a description, then press Continue.
You can then work through each section as below to add in specific criteria for your search. At each point you will be able to view more information if required.
If you wish to access more detail about the codes used in the tool, you can access them here:
ICD10 codes
OPCS codes
BNF codes
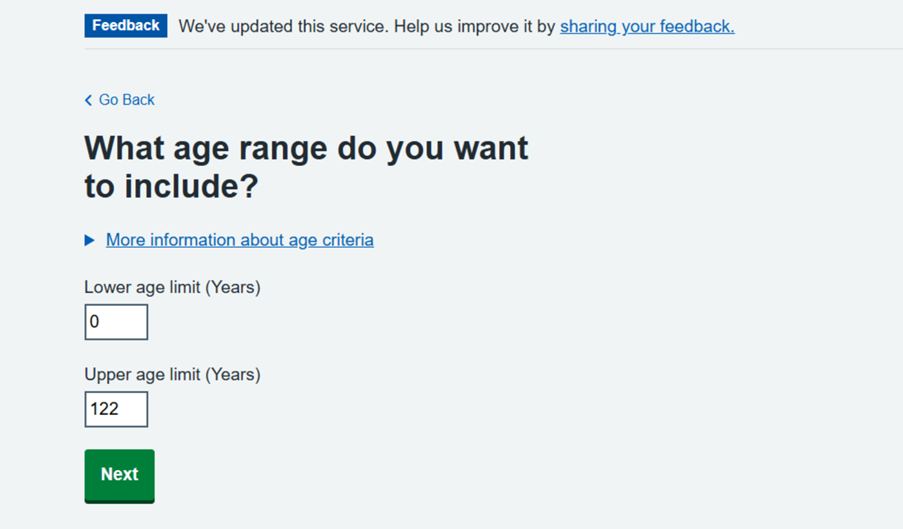
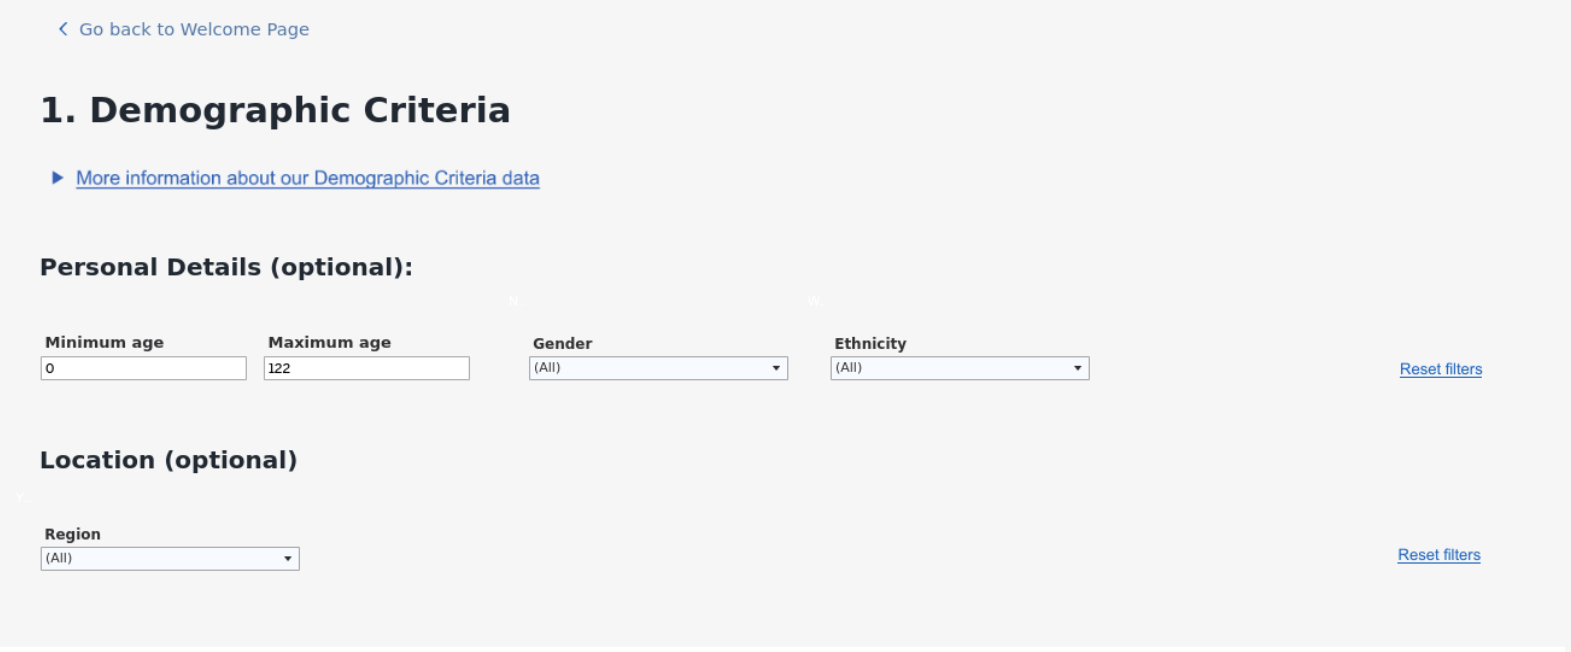
Demographic criteria (Age range, Gender, Ethnicity and Region). Below is an example of the first screen. Use the Next button to navigate through the screens. You will be provided with a summary of what you have selected at the end of this section.
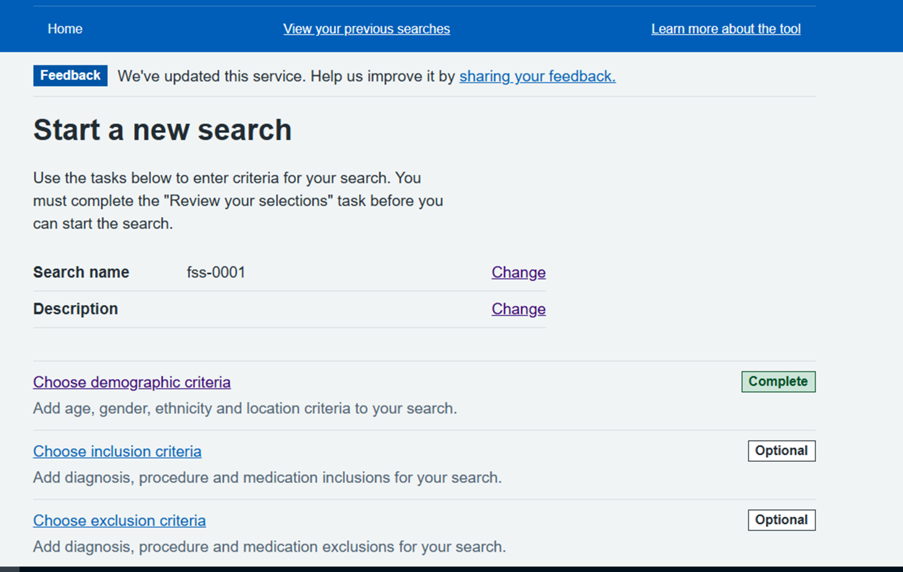
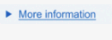
Once you have confirmed your demographic selections you will return to the search selections screen where you will see that the Choose demographic criteria task is Complete. You can then begin another task, for example Choose inclusion criteria.
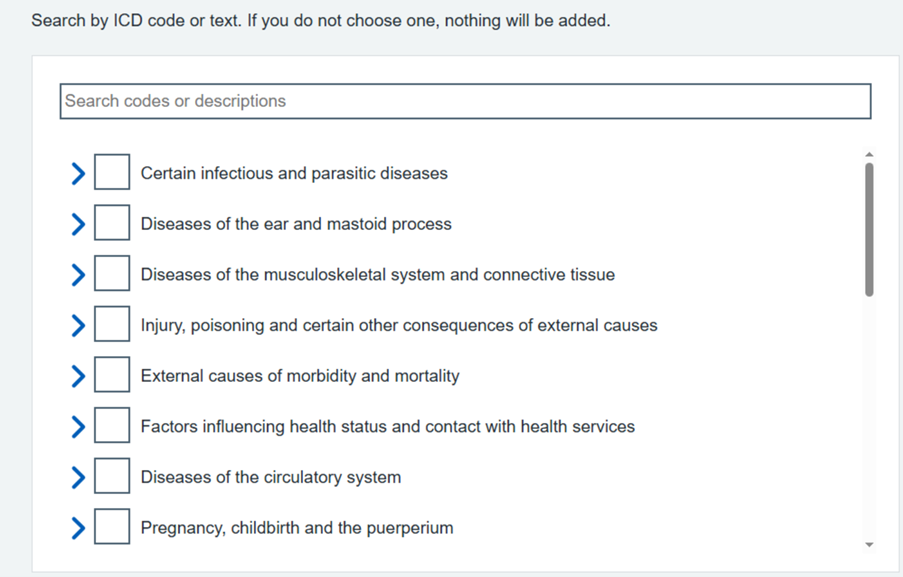
By selecting the Choose inclusion criteria task you can specify diagnosis, procedures and medications. Below is an example of the first screen. Use the Next button to navigate through the screens. You will be provided with a summary of what you have selected at the end of this section.

Below is a description of the logic used between the inclusion criteria to determine which people are included in the search results.
Once you have confirmed your inclusion selections you will return to the search selections screen where you will see that the Choose inclusion criteria task is complete. You can then begin another task, for example Choose exclusion criteria.
By selecting the Choose exclusion criteria task you can specify diagnosis, procedures and medications. Below is an example of the first screen. Use the Next button to navigate through the screens. You will be provided with a summary of what you have selected at the end of this section.
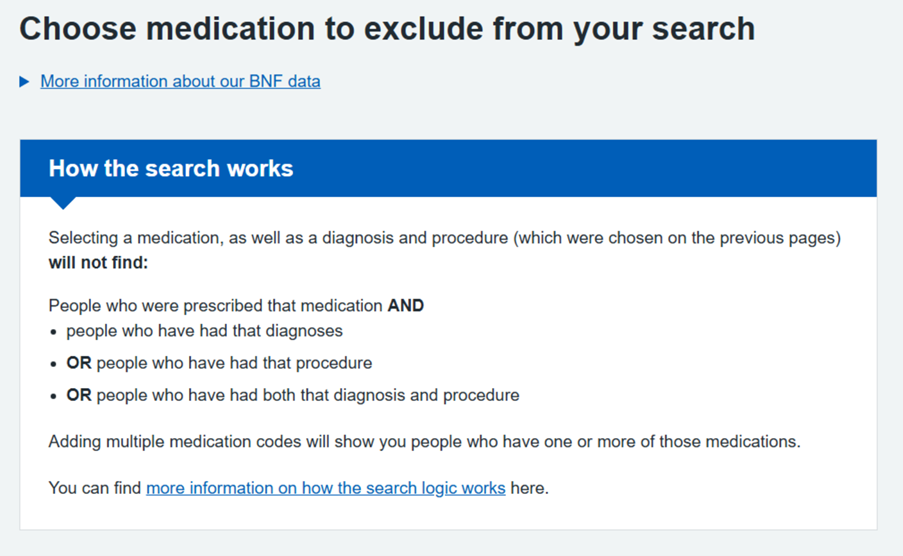
Below is a description of the logic used between the exclusion criteria to determine which people are excluded from the search results.
Once you have confirmed your exclusion selections you will return to the search selections screen where you will see that the Choose exclusion criteria task is complete. You can then begin another task if required.
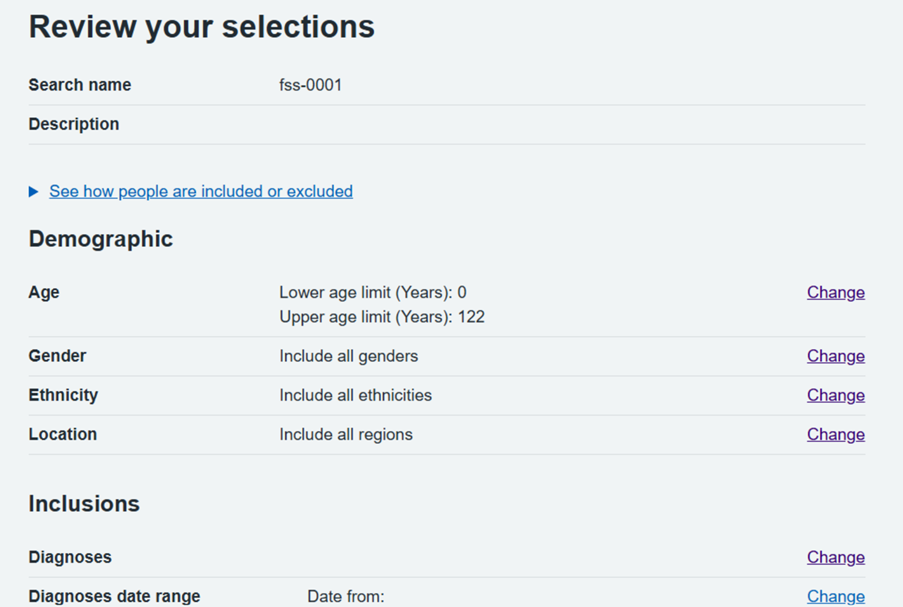
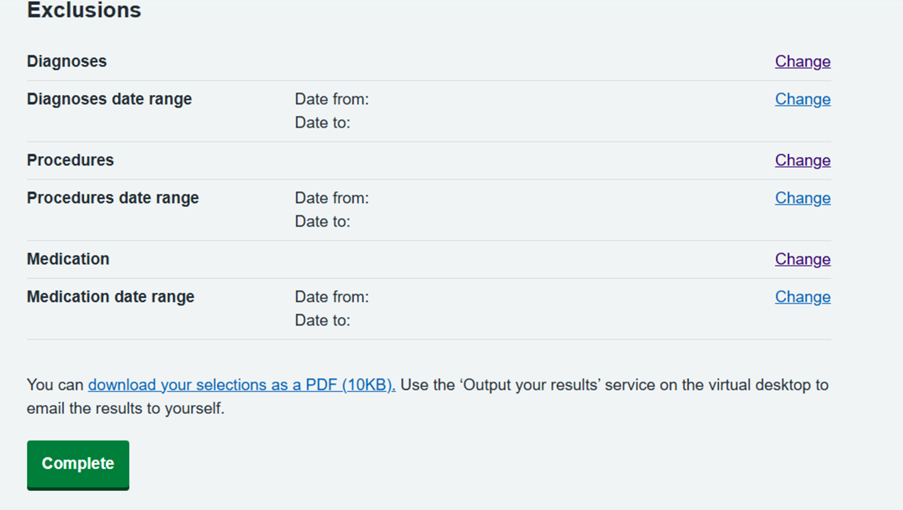
You are then required to Review your selections for the search. This is provided as below. You can also download your selections as a pdf using the link at the bottom of this page.
For further guidance on how to complete this step, see the ‘How to export your results’ section below.
How to run a query
Demographics criteria
All filters are optional and you can use as many as you like.
Using the ‘More info’ icons
If you click the ‘More info’ links a pop-up box will appear.
The box contains metadata and offers further detail on the fields within each section of the search page.
Finding out more about the codes (Clinical Exclusions section)
Find out more about the codes by typing into your browser the links listed in the Clinical Exclusions section.
SDE restrictions mean you won’t be able to click directly on the links on the Search Page.
If you don’t want to type in the links, you can access them here:
ICD10 codes
OPCS codes
BNF codes

Inputting inclusions and exclusions
Inputting inclusions
You choose which information to filter in or out of your query.
Hospital diagnoses and procedures - If you choose to complete both of the diagnoses and procedure sections, your results will return:
- people who have had those diagnoses
- people who have had those procedure
- people who have had both those diagnoses and procedures
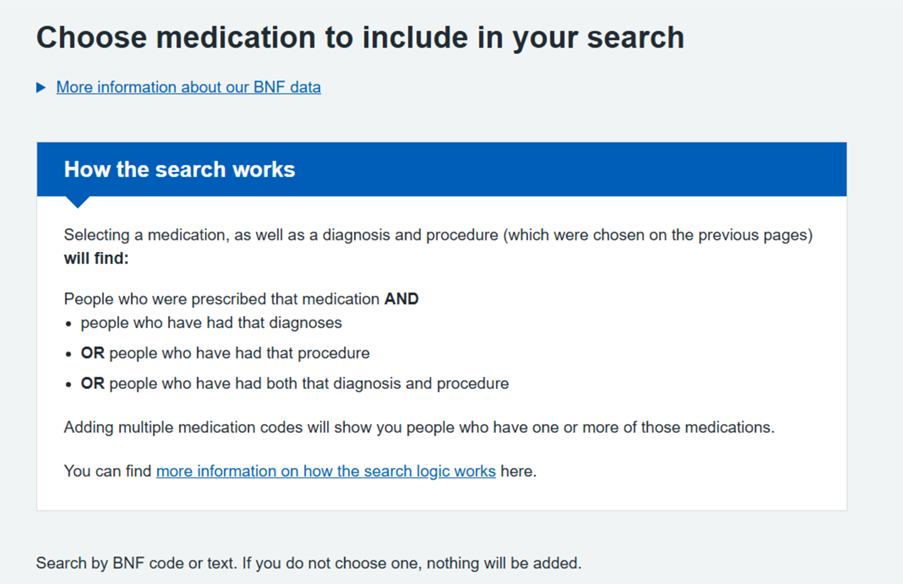
Medication - This section can be completed on its own, but it can also be used with a diagnoses and procedures search to locate people in this cohort taking particular medication, or it can be used on its own to include patients who are taking specific medication from your query.
Example
If you were to select a heart condition (diagnosis) and a heart bypass (procedure) and a medication, your results would return patients:
- who have had either the heart condition diagnosis
- or who have had the heart bypass operation
- and are taking the selected medication for the condition.
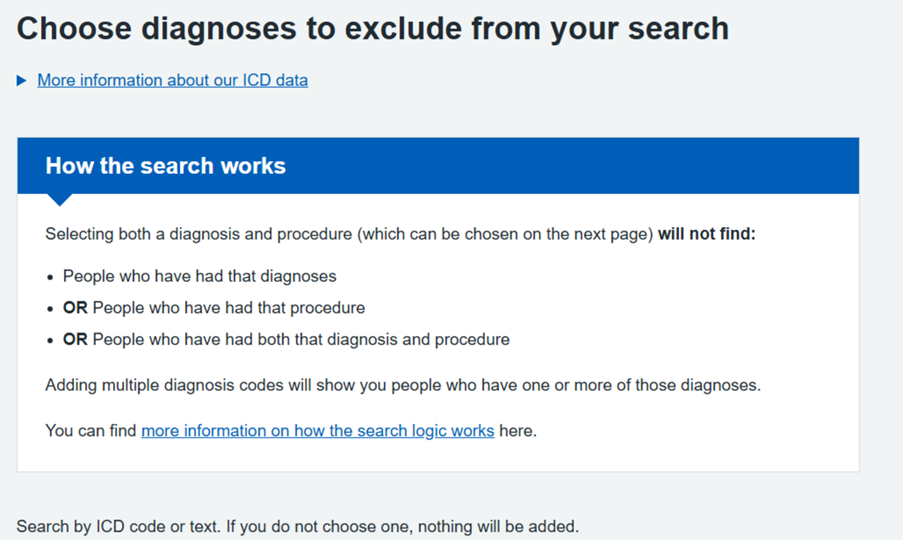
Inputting exclusions
Hospital diagnoses and procedures - If you choose to complete both the diagnoses and procedure sections, your results will not return:
- people who have had those diagnoses
- people who have had those procedure
- people who have had both those diagnoses and procedures
Medication - This section can be completed alongside the diagnosis and procedures search to further refine your results or it can be used on its own to simply exclude patients who are taking specific medication from your query.
Using the ‘Reset’ buttons
The ‘Reset buttons are under the ‘More info’ links.
Clicking on ‘Reset’ will clear the information inputted within each section of the Search Page. It will also reset the ‘Yes/No’ button selections.

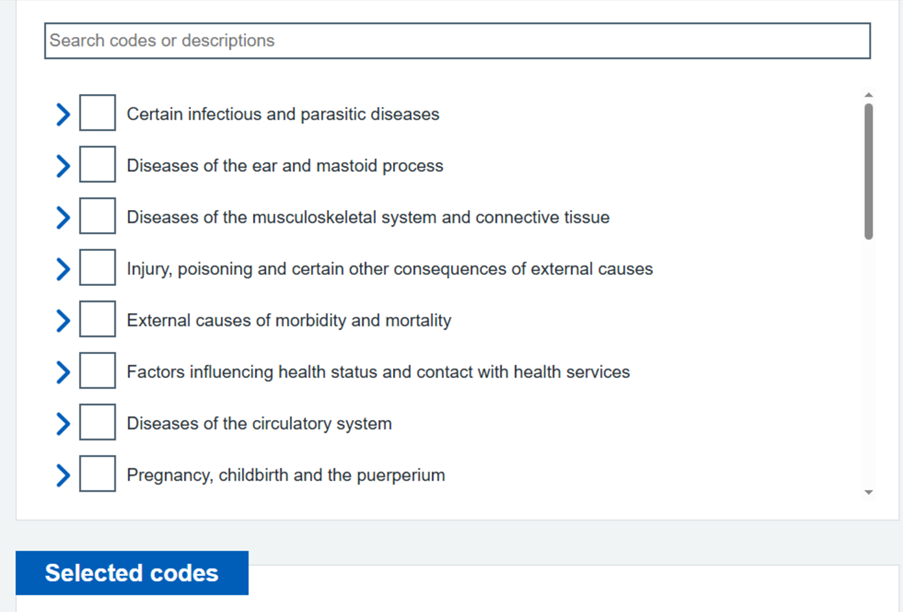
How to select multiple codes
If you want to select more than one code within a certain filter:
- Select the first code you want (A02 in our example).
- Hold down SHIFT on your keyboard and then click the last code you want to select (A18 in our example). This will then select all codes between the two.
- Click on ‘Apply’ - this will add the codes to your query.
You can repeat this as many times as you like.

Checking your query
After entering all your criteria in the search page you will need to click the ‘Continue’ button:

This will allow you to review the criteria before running the query:

Getting your results
Once you have confirmed your selections you will return to the search selections screen where you will see that the Review your selection is complete and you can select Start search. At this point you can also change any of the criteria by selecting Change.
How to use the results page
There are 2 ways of viewing the results of your search:
- table results
- map results - showing where in England your potential trial participants are located
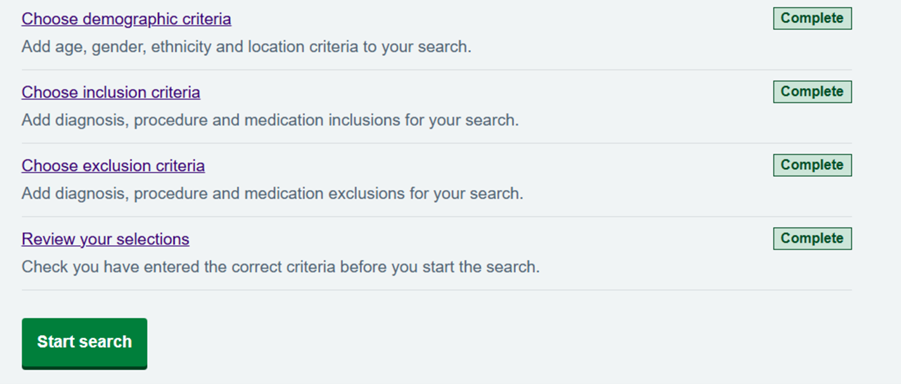
Table results
You will see a loading page indicating your search is progressing. Once complete the search results page will automatically load.
A table displays the data in columns and rows. It is interactive, and you can choose what data is displayed in the table.
To change the data that is displayed in the columns and rows, use the drop-downs on the top-right hand side.
Rows can be changed from Integrated Care Board (ICB) to Region, GP Practice, Trust, Postcode Sector, or IMD- Deprivation Decile.
Columns can be changed from Age to Ethnicity, Gender, or IMD – Deprivation Decile.
Please note: To help protect the identity of patients, suppression has been applied to small numbers. This means that any count below 8 is set to * and any count 8 and above is rounded to the nearest increment of 5.
Additionally, if the total count of the query results (of valid feasibility participants) is less than 100 the table and map view will not display.
Small GP Practices with less than 2,500 valid feasibility participants have been grouped into an ‘Unknown’ category to help prevent identification of patients.
Postcode Sectors with less than 1,500 valid feasibility participants have been grouped into an ‘Unknown’ category to help prevent identification of patients.
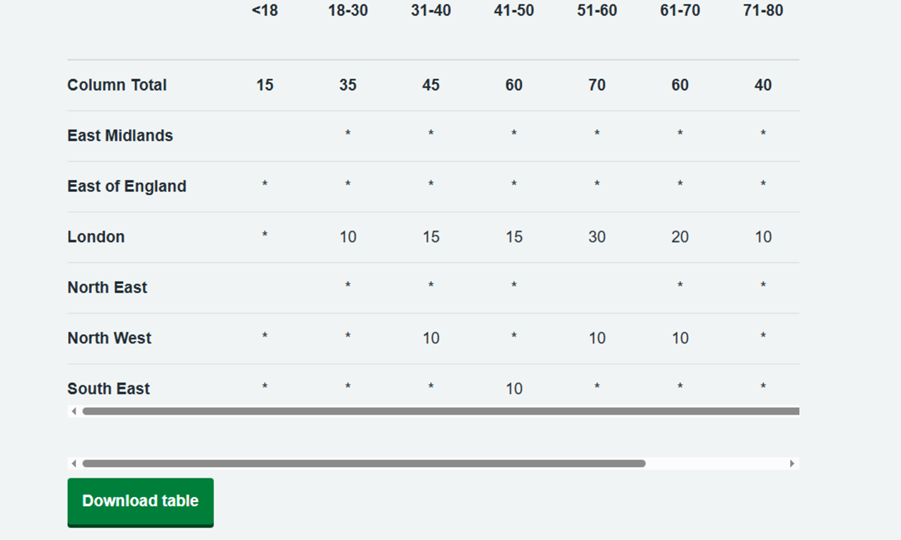
You can select to download the current view of the table by using the Download table button. Follow the ‘How to export your results’ section below for guidance on how to complete this step.
Map results
The map shows where the greatest number of potential trial participants are located. The larger the dot, the higher the number of patients in that location.
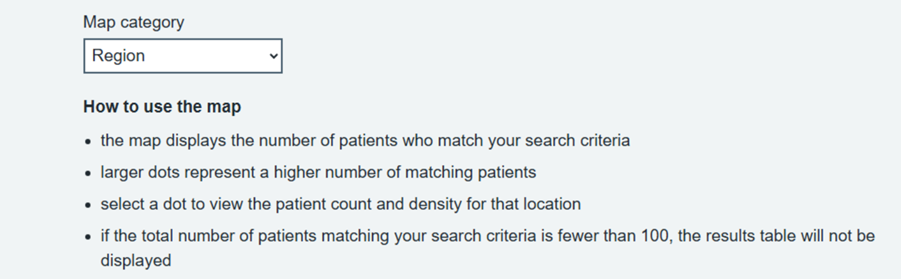
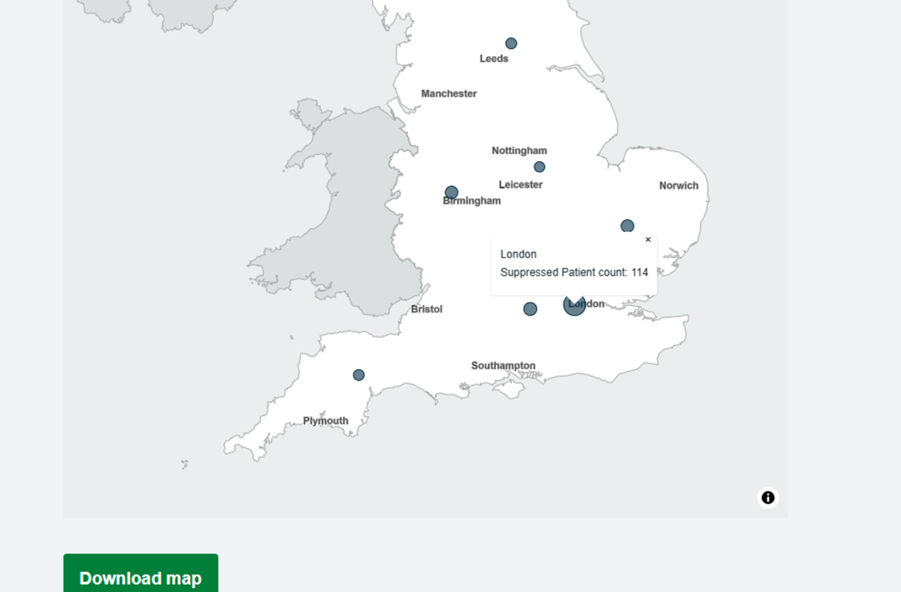
You can select to download the current view of the map by using the Download map button. Follow the ‘How to export your results’ section below for guidance on how to complete this step.
Whilst we have not imposed a limit on the number of queries you can run, the use of this tool is subject to the NHS England Acceptable Use Policy.
How to export your results
Once you have run a query and viewed your results follow these steps:
- Select either the Download table or Download map button.
- Return to the Virtual Desktop.
- Select 'Output your results’.
- Click Start now button from the pop-up box.
- Click Upload results.
- Click ‘Choose file’.
- Select from your Virtual Download folder the file.
- Click the 'Open' button.
- Click ‘Continue’ button.
- Click ‘Upload results’.
- You will receive an email within 5 minutes which will contain a URL link for downloading your results.
- In this page you can also go also view all your results by selecting ‘Go to all results’.
For help with this service please contact the National Service Desk by email at [email protected].
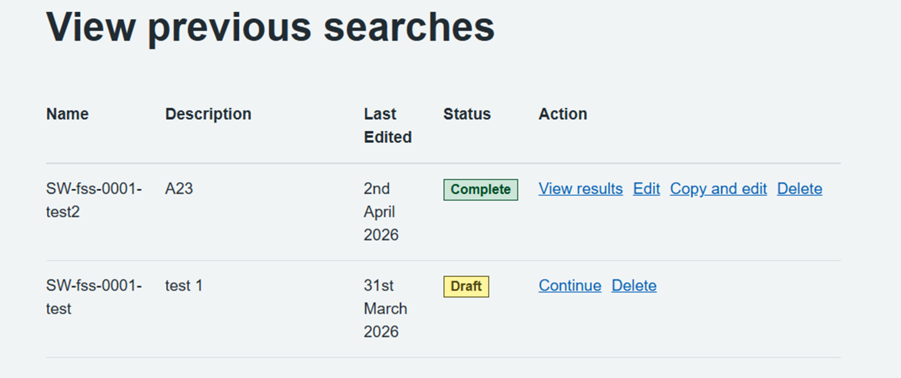
View your previous searches
On the home page you can view your previous searches.
You can continue with Draft searches. These are any searches which you have started but not run the results process for.
For searches marked as Complete, you can view results, edit the original search or copy to edit a new version of that search.
You are also able to delete searches if required.
About the metadata in Feasibility Self-Service
Explaining the derivations and lineage for search fields in the Feasibility Self-Service tool.
PDS - Personal Demographics Service
HES - Hospital Episode Statistics
OP - Outpatient
APC - Admitted patient care
Age
The minimum/maximum age of inclusion.
The age of patients is calculated from the date on which the patient was born or is officially deemed to have been born.
Data source = PDS (or HES OP if not available in PDS, then HES APC if not available in HES OP, then given an ‘unknown’ value if no date of birth (DoB) data available from any source).
Update method/frequency = Daily refresh
British National Formulary (BNF)
Patient records of dispensed medication, with the codes validated against Data Steward Service data to ensure that they exist, and for the retrieval of the latest description of the medication. The date used for BNF filtering is the first day of the month of the latest dispensing event during which data is submitted by pharmacists to NHSBSA for processing.
Data source = PCareMeds
Update method/frequency = Daily refresh, source is updated on approximately 20th day of every month.
Data available from = 1 April 2018
Ethnicity
The ethnicity of the patient, as specified by the patient. This is the classification used for the 2001 census. From April 2001 the codes were changed to represent the ethnic data categories as defined in the 2001 census. However, HES continued to accept the old codes as well as the new codes for the 2001-02 and 2002-03 data years.
Any patient who we don’t have HES data for will also be defaulted to having an ethnicity of ‘Unknown’. This means that if you were to run a query against the whole population, without including any clinical criteria, you will see a higher proportion of patients with an ‘Unknown’ ethnicity, as compared to when you run a query that includes any diagnosis or procedure criteria. This is due to patients who are registered with a GP who we don’t have any HES data for being included in the results.
Data source = HES APC is available or HES OP if HES APC not available. Otherwise, the ethnicity is logged as ‘Unknown'.
Update method/frequency = Daily refresh
International Classification of Diseases (ICD)
Patient records of condition diagnosis, with the codes validated against Data Steward Service data to ensure that they exist, and for the retrieval of the latest description of the diagnosis.
The date used for ICD filtering is when the patient was under the care of a particular consultant. If a patient has more than one episode in a spell, for each new episode there is a new value. However, the admission date which is copied to each new episode in a spell will remain unchanged and will be equal to the episode start date of the first episode in hospital.
Only the latest episode will be available from the database.
Data source = HES
Update method = Daily refresh, source data updated monthly by month end.
Data available from = 1 April 1989
Classification of Surgical Operations (OPCS)
Patient records of operating procedures, with the codes validated against Data Steward Service data to ensure that they exist, and for the retrieval of the latest description of the procedures. The date used for OPCS filtering is when the patient was under the care of a particular consultant, based on the scheduled appointment date. If a patient has more than one episode in a spell, for each new episode there is a new episode start date. Only the latest episode will be available from the database.
Data source = HES
Update method = Daily refresh, source data updated monthly by month end.
Data available from = 10 November 1992
Region
Region location is based on the patient's post code taken from PDS address data. As of 1st April 2026 these are mapped to the new NHS England regional boundaries.
We check the post code value against DSS Corporate post code reference data to ensure that it’s valid, then we retrieve the region value from same DSS Corporate reference table.
Data source = PDS.
Update method = Daily refresh.
Sex
Defines the sex of the patient. The classification is phenotypical rather than genotypical, meaning it does not provide codes for medical or scientific purposes.
Notes:
- National Code(Not Known) means that the sex of a person has not been recorded
- National Code(Not Specified) means indeterminate, meaning unable to be classified as either male or female.
Data source = PDS (or HES OP if not available in PDS, then HES APC if not available in HES OP, then given an ‘unknown’ value if no sex data available from any source).
Update method = Daily refresh.
Patient location data (map view lat, lon)
Latitude and longitude values for patient locations based on different geographical units. This data is used by the map view to show patient counts from query results on the results page map view.
Currently the results page map view handles the following geographical units:
- ICB
- Closest Trust
- Region
Data source = DSS Corporate Geometry
Update method = Daily refresh
Feasibility Self Service business rules
Patient business rules
1. How do patients appear on the tool?
Patients who meet the DigiTrials valid feasibility patient criteria will have:
- patient is alive
- patient has a valid NHS number
- patient is registered with a GP in England
- patient's demographic record (PDS) is not flagged as 'Sensitive'
- patient's demographic record confidentiality code (PDS) is not flagged as 'I' for invalid
Furthermore, patients that are registered with a military or prison GP practice are also excluded from query results.
2. What demographic criteria is used in the tool?
All patient demographics must be the most recent values on record - most recent gender for example.
3. Which trusts are used to calculate the patient's nearest trust?
The calculation of the patient's nearest trust is based on factors such as:
- active and open trusts only
- trusts that are not excluded as a high-level health geography exclusion (code Q99)
- trusts that are not excluded as a trust national grouping exclusion (code W00)
- benchmark group acute type trusts only - should return only secondary care trusts
- a mapping of all patient Lower Layer Super Output Area (LSOA) latitude/longitude values to all Acute Trust LSOA, latitude/longitude values
- individual patient's LSOA used to obtain the nearest trust value from the mapping
- trust LSOAs give the very central location of a trust
4. How is a patient associated to an ICB?
To identify a patient's integrated care board (ICB), we:
- Identify their registered GP practice.
- Identify the parent ICB for this GP practice.
5. How is suppression applied to GP practices?
To suppress low population groups (active GP practices with less than 2,500 registered patients that also meet the criteria in section How do patients appear on the tool?) and protect patient data, we mask GP practice names and codes with the value 'Unknown', so that those results are grouped together under the 'Unknown' value in the FSS Tool when viewing results by GP practice.
Additionally, we filter out any GP practices that are not classed as active, so practices that are; dormant, temporarily closed, or completely closed, migrating patients to another practice.
6. How is the age calculated for the patient?
To get the best possible age value for a patient, we attempt to pull date of birth values if present from PDS, HES APC and HES OP to then derive the age value. Once we have these three values, we then check for the first real non null value (as per the order above) and use that as the Feasibility age value for the patient.
7. How is the Index of Multiple Deprivation calculated?
We obtain the Index of Multiple Deprivation (IMD) score for a patient by cross referencing the patient's postcode (LSOA11) with NHS England corporate reference data (Indices of Deprivation corporate reference table).
If we cannot validate the patient's postcode then we set that patients IMD score to being 'Unknown'.
8. What age range can be used to run a query?
If the user selects to run a query with an age range of less than 3 years, the query will automatically be adjusted to increase the maximum age to give a 3 year age range and the following warning message will be displayed 'Min age range 3 years – ages will be adjusted in search', such as entering 19-20 will be auto-adjusted to 19-21.
9. How are small numbers suppressed in the tool?
To protect the identity of patients and ensure confidentiality is maintained, HES suppression has been applied to small numbers. For example:
- any count below 8 is set to *
- any count equal to or above 8 is rounded to the nearest increments of 5
- if the grant total is below 8, * will be displayed
- if there are no patients for a combination of Row/Column values result, the result will be blank
- if the sum of the patient count for the whole search is below 100, then the table will not be displayed
- if the Rows selection is GP Practice, practices with less than 2500 registered people that meet the DigiTrials valid feasibility patient criteria are grouped into an Unknown category
- if the Rows selection is Postcode sector, postcode sectors with less than 1500 people that meet the DigiTrials valid feasibility patient criteria are grouped into an Unknown category
10. How are low population postcode sectors suppressed in the tool?
To protect the identity of patients and ensure confidentiality, postcode sectors with less than 1,500 valid feasibility patients (see section How do patients appear on the tool?) are suppressed and are grouped under the value ‘Unknown’ in the results page table.
Medical code business rules
1. How are diagnosis and procedure dates calculated?
The data that the tool uses only contains all instances of any diagnosis (when the appointment was scheduled for), procedure or dispensed prescribed medication code for a patient. This enables users to be able to search by their own date range values for each medical dataset inclusion and/or exclusion.
There are static start/from dates for each medical code dataset which are applied within the Feasibility Self Service Tool, see the meta data section of this page, or the tool itself for the specific dates. These dates are based on the earliest available data within each medical code dataset.
The end/to dates for each medical code dataset continue to move over time as they are based on the most recent processing of the source data into the database used by the Feasibility Self Service tool.
To see the latest available date this will be detailed underneath the end/to date field in the tool itself.
Note: Users can enter dates that exceed the date which the data runs up to for a medical code dataset as the tool does not restrict what is entered into this field. If a user does enter a date greater than the maximum available dated data for the dataset, then the query results will still be based on the maximum available dated data for the dataset.
2. How is diagnosis data calculated?
It is not only the patient’s initial or primary diagnosis that is used - any outpatient appointment or any inpatient hospital stay tied to the provided ICD code(s) determine a diagnosis.
It is important to note that a patient will only ever appear once within a single search. As an example, patient X had separate outpatient appointments or inpatient hospital stays that are associated with a a specific ICD-code on a variety of different dates across 2022 and 2023, as per the underlying HES data. If you ran the query with a date range of the calendar year 2022, and again for the calendar year 2023, you would have patient X included in both (once). If you ran the query with a date range of 1/1/22 to 31/12/23, again patient X would only appear once (not twice, as a patient can only appear once in a set of results).
3. Which prescriptions are included in the tool?
Medication codes only include those that were prescribed in England.
4. What other validation is done against the codes in the tool?
Using NHS England corporate reference tables, we check that the medication codes, diagnosis codes and procedure codes we retrieve for a patient are valid. If any codes cannot be found in the NHS England corporate reference tables then we filter these records out of our database.
Last edited: 28 April 2026 10:55 am